Quick Navigation
- Step 1: Claim Your Number
- Step 2A: Complete 10DLC Registration
- Step 2B: Connect Your Number
- Step 3: Set Up Profile & Preferences
- Step 4: Add Users
- Step 5: Add Contacts
1. Claim Your Number
Before sending messages through Text Request, you need a verified number with texting capabilities.
You have two options for establishing your Text Request number:
a) get a new, text-only number through Text Request when you set up your account.
b) use your current business number.
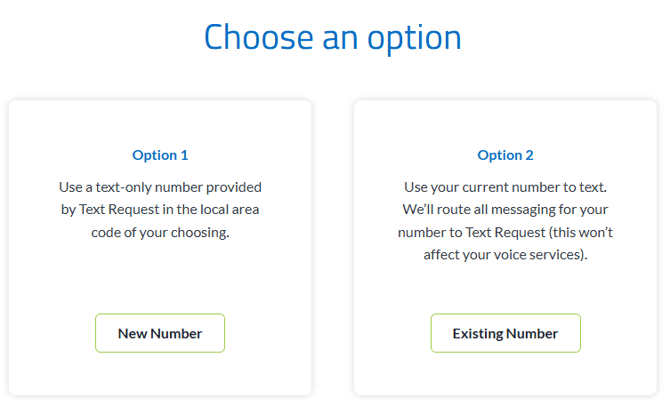

Option 1 - New Number
If you get a number through Text Request, you will receive a provisioned number. A provisioned number will not have an active voice function. It can only send and receive texts and images, which is why we call them text-only numbers. We can also add call forwarding to this number for a fee.
To receive a new number through Text Request:
1. Select New Number under Option 1.
2. Select the country you're in and enter the area code you’d prefer to use.
3. Click Search.
4. Click any of the numbers from the list to select it. If you don’t like any of the available numbers, click Refresh List to generate a new list.
5. Click I'll Take It to confirm the selected number.
Option 2 - Existing Number
If you use your existing business number, it will become an SMS-hosted number. A hosted number is a number that has been given texting abilities by Text Request. Hosted numbers let you route SMS messages through the Text Request dashboard.
As the owner of the number, you must permit us to make it SMS-hosted.
To make an existing number SMS-hosted:
1. Select Existing Number under Option 2.
2. Enter the phone number you’d like to SMS host.
3. Click Check. This will confirm whether or not the number can be hosted in Text Request.
4. Click Set Up if your number is eligible.
2. Complete 10DLC Registration & Connect Your Number
Step 2 is broken up into two options. You must complete both, but the order differs depending on individual factors.
- Proceed to 2A if your number is currently hosted somewhere else and you don’t want an interruption in texting services.
- Proceed to 2B if your number is not currently hosted somewhere or if you don’t mind an interruption in texting services.
2A. Complete 10DLC registration
Now that your number is set up, it’s time to register for 10DLC. If you want more information about what 10DLC is, feel free to check out our 10DLC registration guide.
10DLC stands for "10-digit long code," or standard phone numbers like 423-218-0111. For messages to be delivered, carriers require businesses and organizations to register their 10DLC numbers.
Help: For a detailed walkthrough of each section of the 10DLC registration forms, see our 10DLC Complete Walkthrough guide.
To complete your 10DLC registration:
1. Click Register in the 10DLC Registration box.
2. Complete the Company – Set Up form.
3. Click Submit and wait for the form to be accepted.
4. Complete the Use Case – Set Up form. You cannot complete this form until the Company – Set Up form is accepted.
With both forms completed and accepted, you’re all set! We’ll submit your information immediately, but it can take several weeks for full approval from our connectivity partners. You may be able to send texts during this time but will experience a lower throughput and higher filtering until you are fully registered.
2B. Connect Your Number
You’ve registered your number with Text Request, but now we have to connect it so you can get texting. This will require you (or someone else at your company) to complete a Letter of Authorization (LOA).
To connect your number:
1. Click Connect in the Connect Your Number box.
2. Click Connect Now if you’re ready.
3. Select either I will sign the LOA or Someone else will sign the LOA depending on what works best for you and your company.
4. Complete the form with information for the person who will sign the LOA.
5. Click Send LOA.
6. Check the email inbox of the address you provided in the form and complete the LOA.
Our team can now start SMS-enabling your number. It should be activated within the same business day, so check back periodically or enable text notifications for updates.
Note: Some VOIPs, such as toll-free lines, don't play nice with permissions. We may need to work directly with your phone company to verify your phone number for SMS hosting. If this happens to be the case, we’ll notify you as soon as possible.
If you immediately went to step 2B from step 1, please return to 2A and complete 10DLC registration.
3. Set Up Profile & Preferences
While you wait for everything to process with your number, you can set up your Profile & Preferences. You can access the profiles and preferences screen from anywhere in Text Request. Select your avatar in the top right corner and select any of the four options you see.

For detailed information on each of the following sections, visit our Profile & Preferences guide.
Profile & Preferences have four categories to explore:
- Profile
- Conversations
- Notifications
- Security
Profile
The first option is your profile. The profile section allows you to customize your user profile with four distinct categories.
- Display Name
- Profile Picture
- Signatures
- Password
Conversations
The second option is your conversation preferences. The conversation section allows you to create preferences for how you view and interact with your messages.
- Default Message View
- Default Sorting and Filtering
- Resolve on Send
- Persistent Contact Sidebar
Notifications
The third option is your notification settings. The notification section allows you to adjust your settings for how you are notified of a new message. For more information about notifications, visit our message notifications guide.
- Visual
- Sound
Security
The fourth option is your security settings. This area is currently dedicated to setting up multi-factor authentication for your account. If your administrator requires multi-factor authentication, you'll set it up during your first login attempt after it's activated. If you are not required to use multi-factor authentication, you can enable it here by toggling Verify with SMS on.
For administrators interested in requiring multi-factor authentication for all users, see our multi-factor authentication guide.
4. Add Users
Adding a new Text Request user is quick and easy! Having more than one employee texting will streamline a lot of your processes.
Note: When setting up a new user, you must use a valid email address. If the email address is invalid, the new user won’t receive the email containing their password.
To add a new user:
1. Go to the Users menu.
2. Click the + New User button.
3. Enter the new user’s information.
4. Assign the Permission Level. (Manager, CSR, or Administrator).
Manager is the default permission level for all added users, and it’s perfect if you want your user to be able to add contacts, create groups, and adjust settings.
CSR is useful if you only want the user to respond to people and send out updates.
Administrator is for users who should have access to billing and account usage details. You are able to have multiple administrators. Current account administrators will also see the option to Make this user an administrator by selecting the ‘edit’ button by the user's name.
5. Click + Add User.
For a full breakdown of different permission levels, see our user permission levels guide.
5. Add Your Contacts
Instead of manually entering each of your contacts, Text Request allows you to import entire lists.
Importing contacts to your address book requires a spreadsheet in a CSV (Comma Separated Values) format. Microsoft Excel or Google Spreadsheets tend to work best when creating a CSV.
Phone numbers should be in column A, and any other information you want to import should be in column B and beyond. If you have a CRM contact list, pull these contacts from that list.
Quick Import Example Detailed Import Example


Once your spreadsheet is formatted correctly and saved as a CSV file, import the sheet by going to the Contacts menu in your dashboard. Then click Import under the View Contacts section.
Select either Quick Import or Detailed Import.
- Quick Import only imports phone numbers.
- Detailed Import imports phone numbers for each of your imported contacts and any additional information you included in column B and beyond. *Recommended*
To import contacts using Detailed Import:
1. Click Detailed Import.
2. Choose the .csv file with the contacts you want to import.
3. Click the Assign dropdown arrows to assign any data points to the Custom Fields you have in Text Request.

4. Click Confirm Mapping.
5. Choose whether you want to Update Duplicates found within your file or not. You can also add Groups and Contact Tags at this stage.
6. Click Import when you’re ready.
You can further customize your contacts by adding Contact Tags and Custom Fields.