Contact Tags
Contact Tags help you group, sort, and identify contacts based on tags you create.
For instance, you might create contact tags to organize which rep is working with that contact, or which stage of the sales funnel they fit into.
To create a new Contact Tag:
1. Go to Contacts.
2. Under Manage, click Contact Tags.
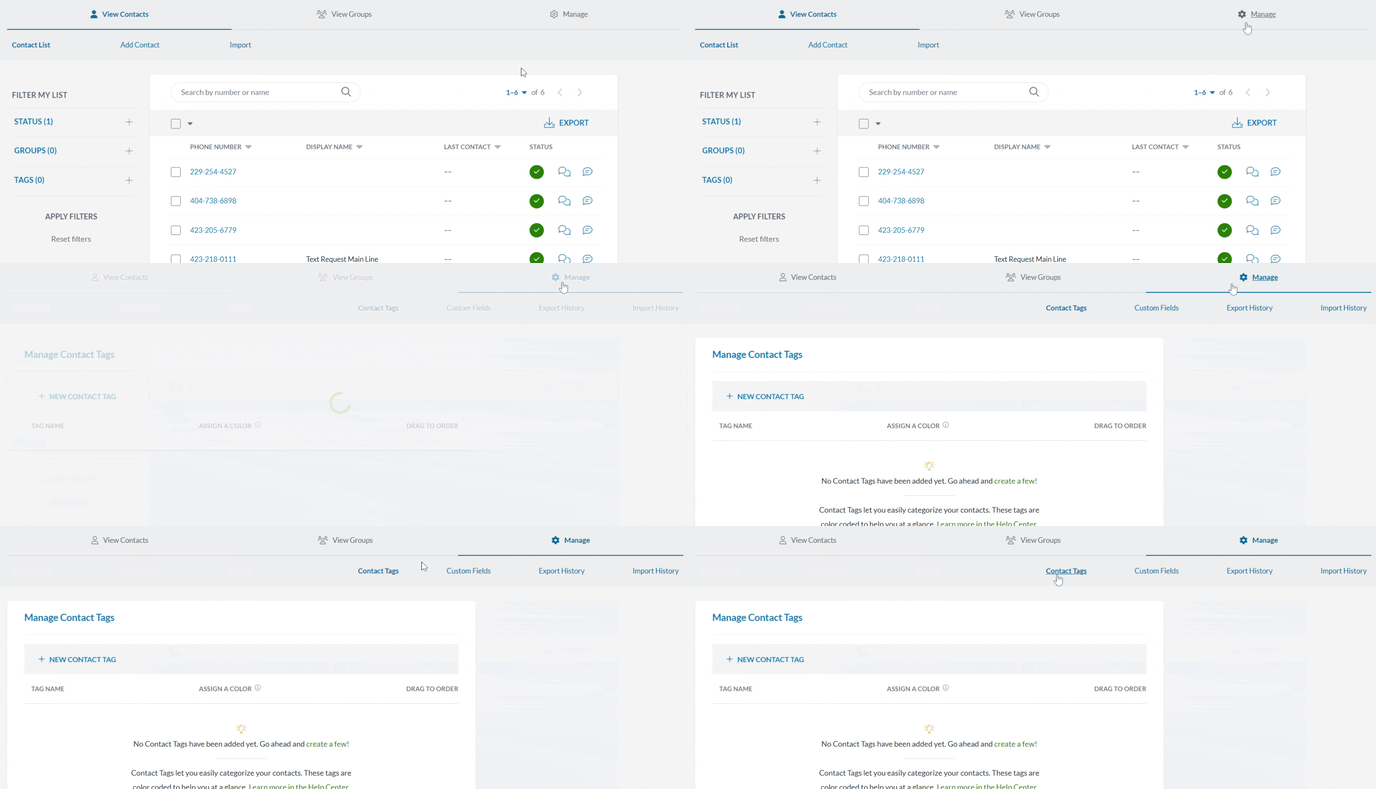
3. Click + New Contact Tag.
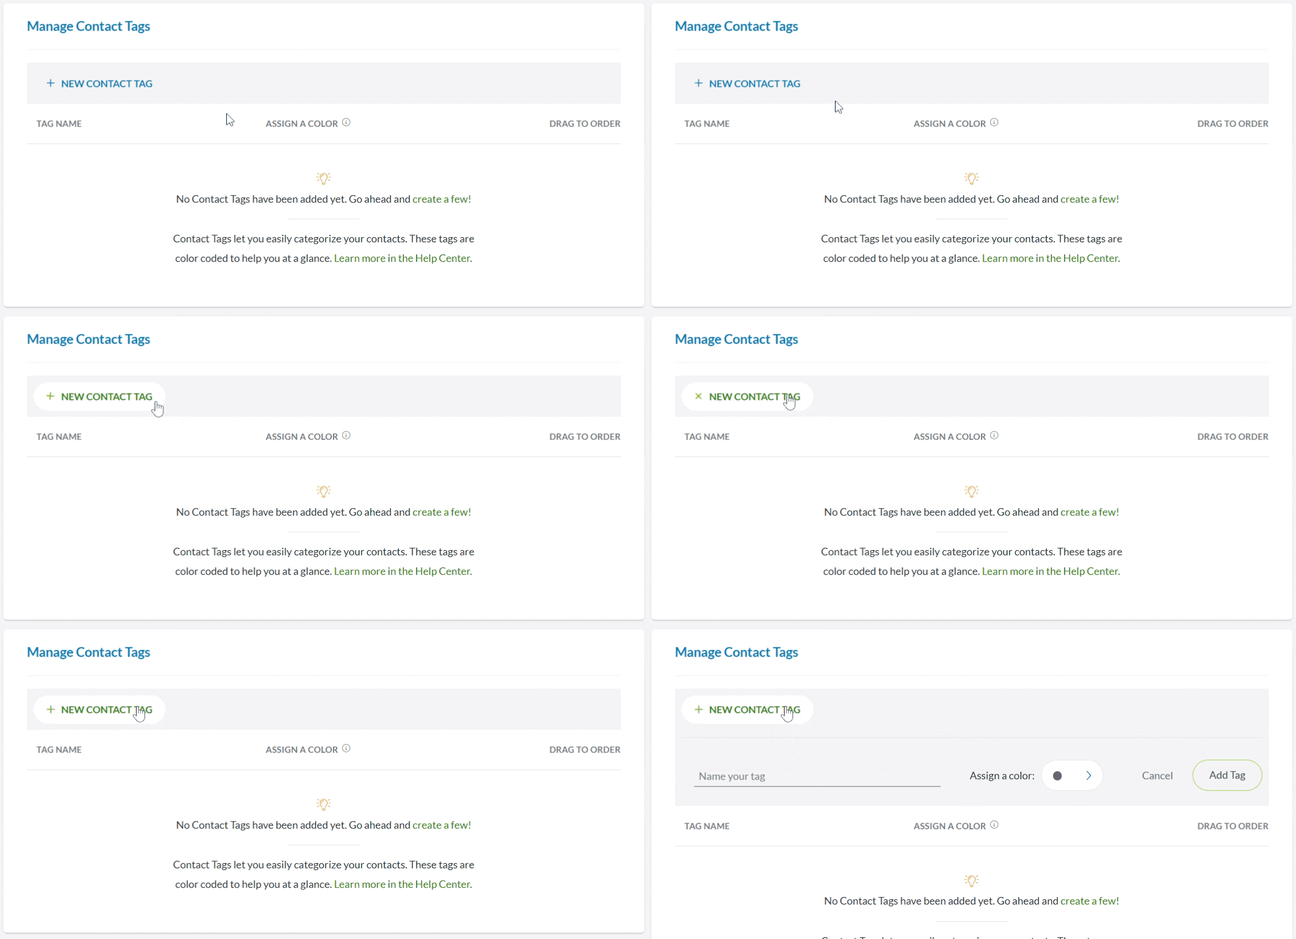
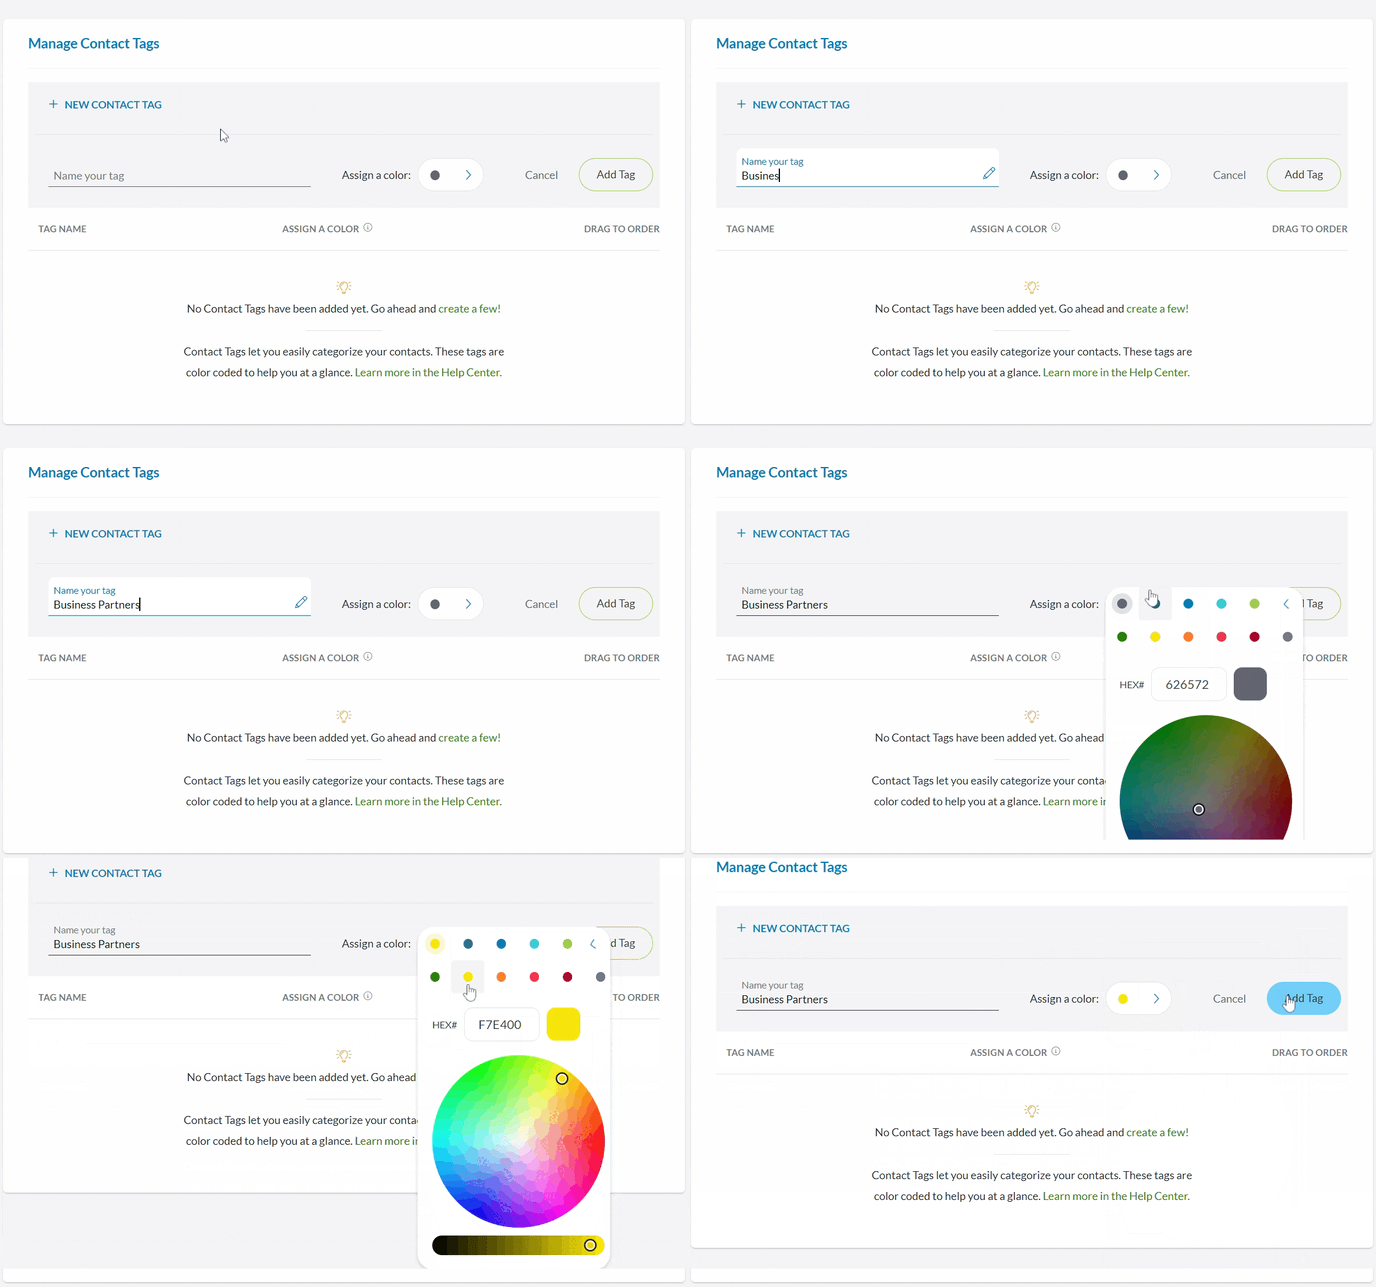
4. Name your tag and assign a color (for easy identification and filtering).
5. Click Add Tag.
You can edit a tag’s name and color anytime by moving your mouse over it and selecting the pencil icon. Any edits you make to a tag will automatically update across the rest of your dashboard.
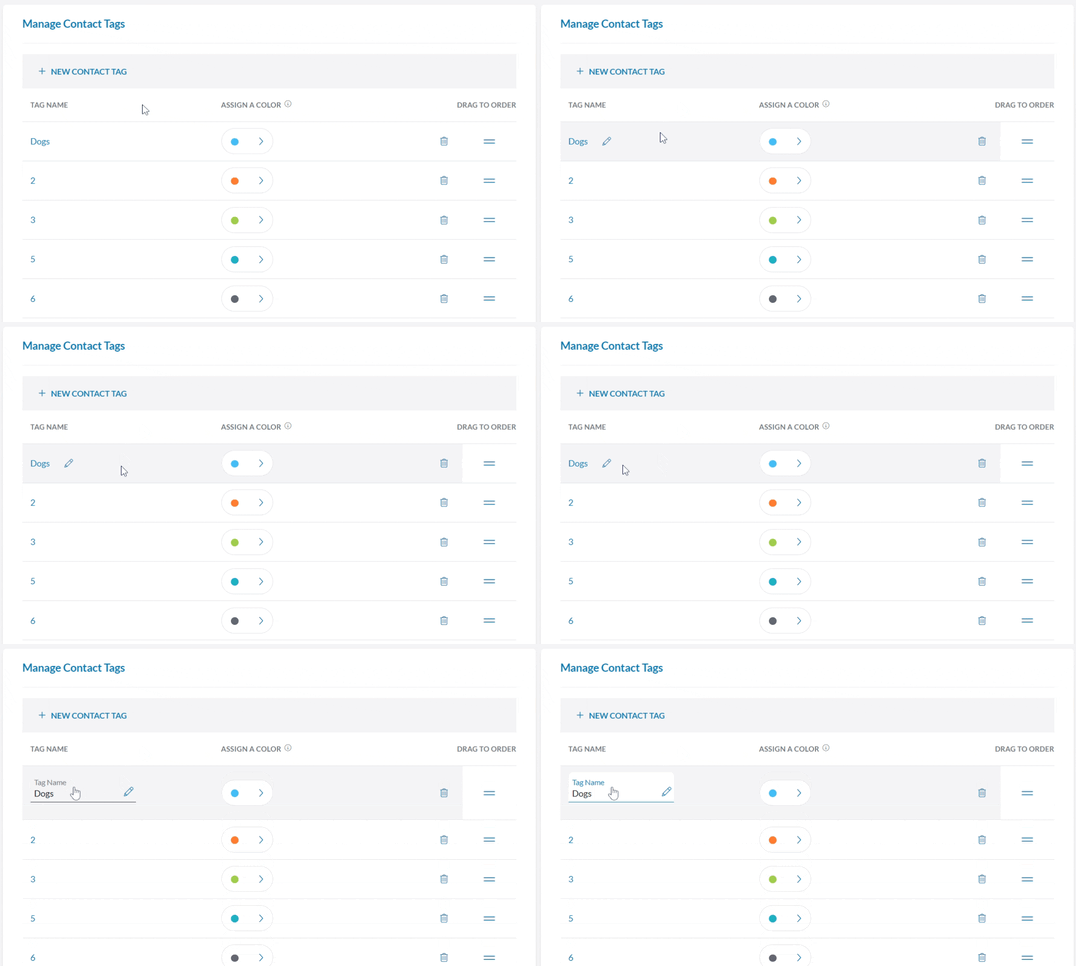
Edit a Contact’s Tags
You can edit an existing contact’s tags by opening the contact’s Details section in the Contacts menu of your dashboard.
To edit a contact’s existing tags:
1. Click the Contact’s phone number to open its Details.
2. Expand Contact Tags.
3. Click the Add Contact Tags dropdown.
4. Select the name of the Contact Tag or the + button.
5. Click the Add button.
6. Click Save Edits.
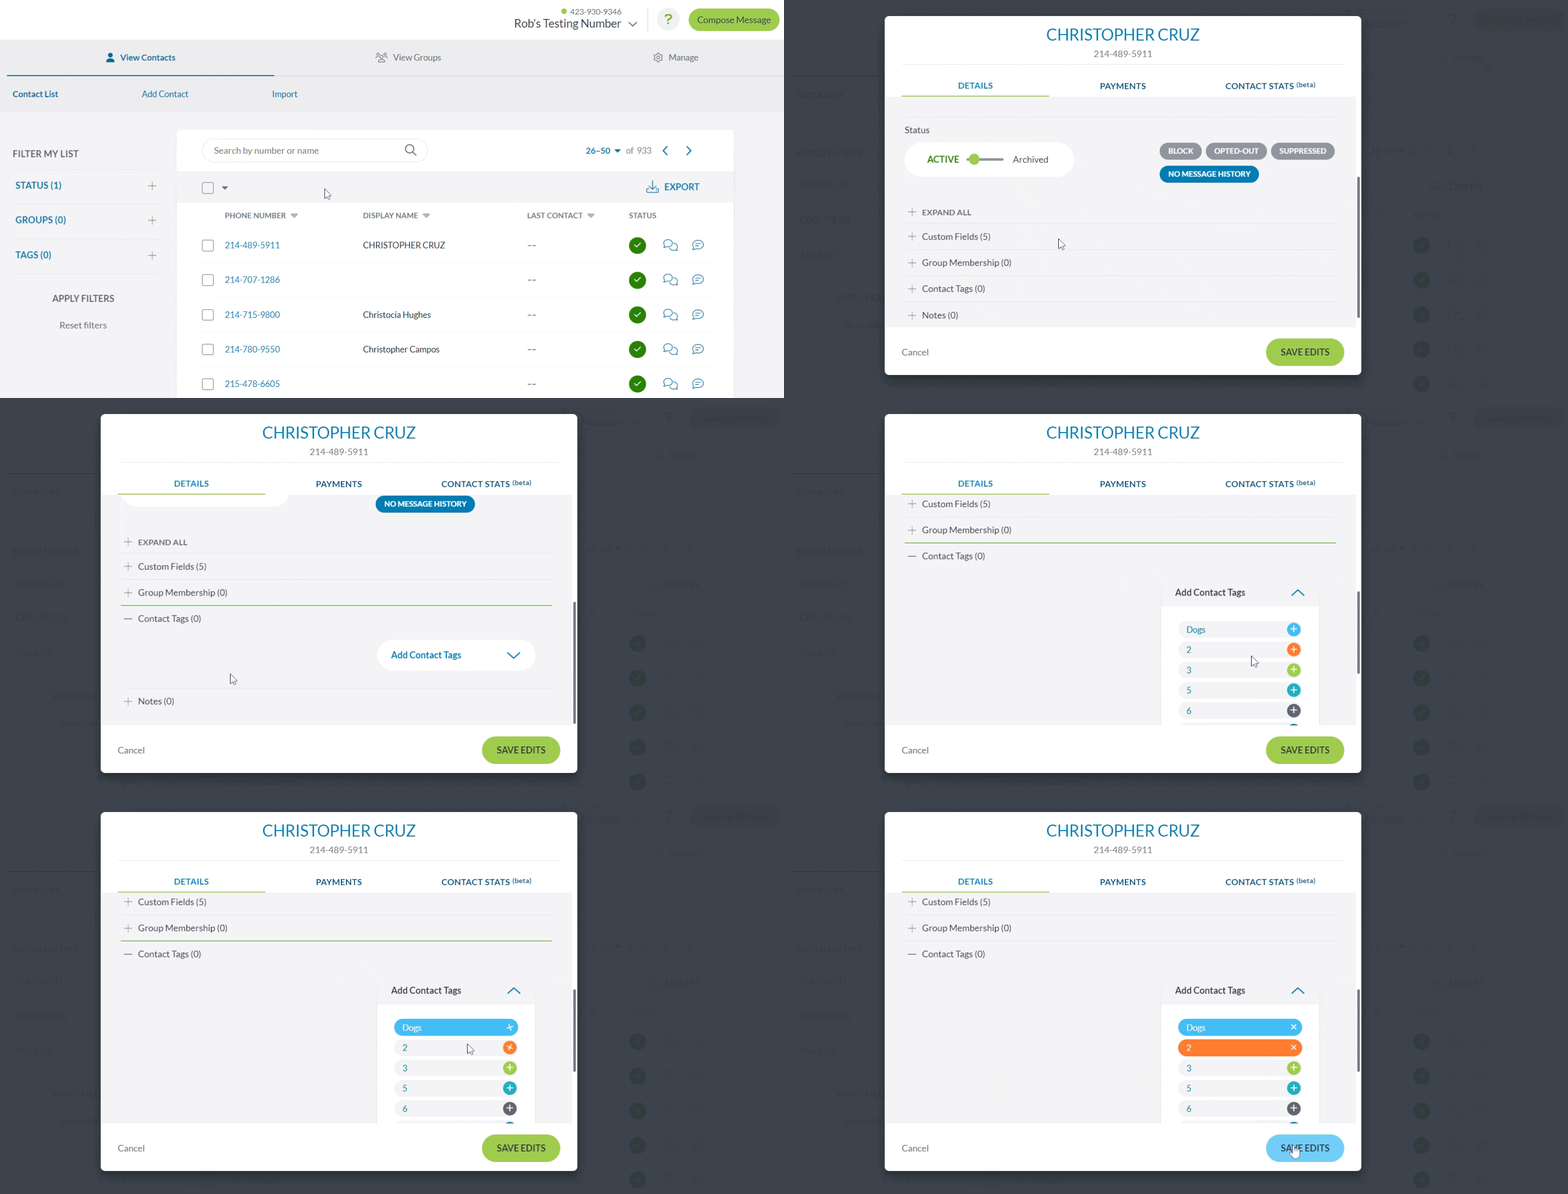
7. To remove a contact tag, click the X next to the tag, then click Save Edits.
Contacts can have any number of tags or no tags at all. The Details section can also be accessed anywhere else that contact is shown, such as Conversation Blocks or Payments.
Color Selection
When assigning a color to a contact tag, you can either choose one of the preset colors available or make a brand-new one. Use the color wheel to determine which color you want and then the shade slider to move between a lighter or darker version of that color. This not only helps when you have dozens of contact tags, but it’s also a lot of fun!
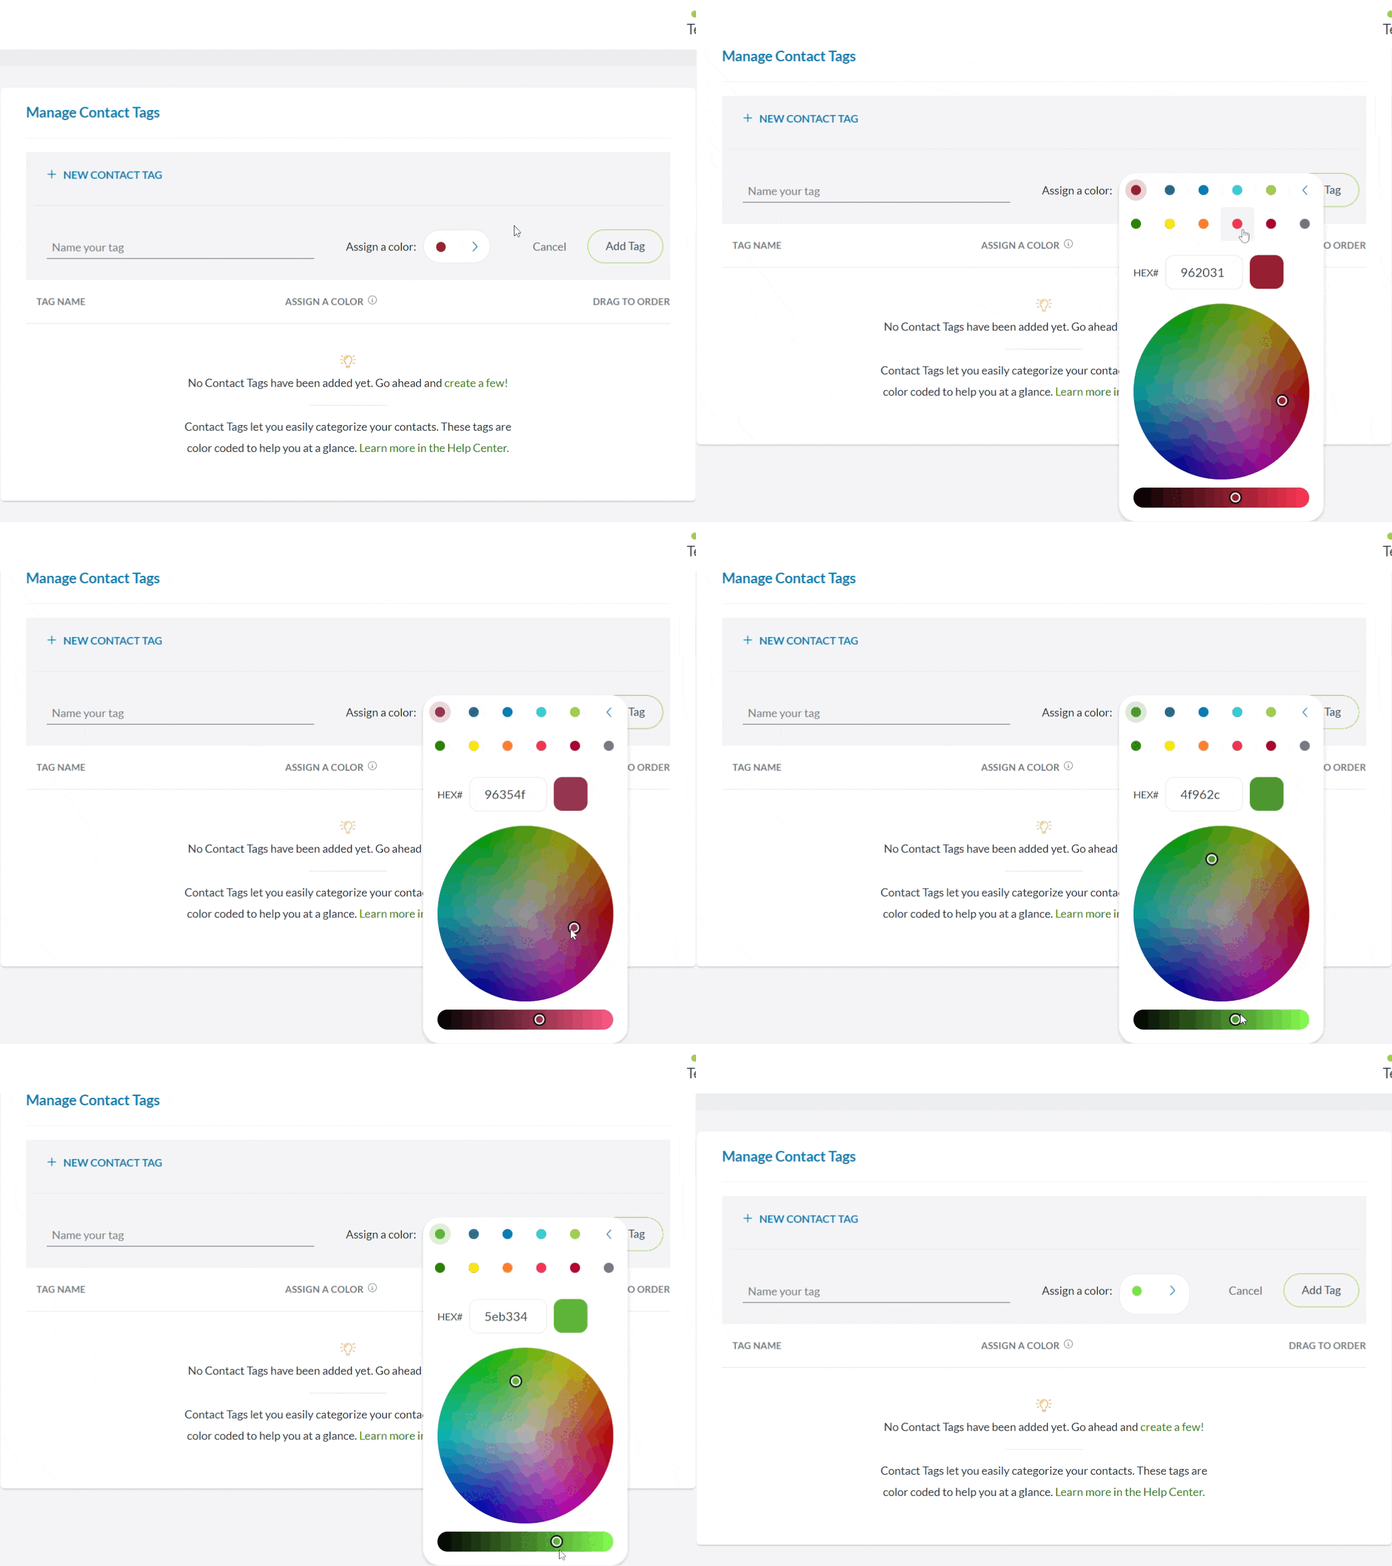
When using the color wheel, keep in mind that not everyone sees color the same way. The quick select colors that appear above the wheel were chosen based on specific guidelines that allow for the widest variety of people to be able to distinguish between. Try to keep your Contact Tag colors as different as possible to prevent people from getting confused.
Where Can I See Contact Tags?
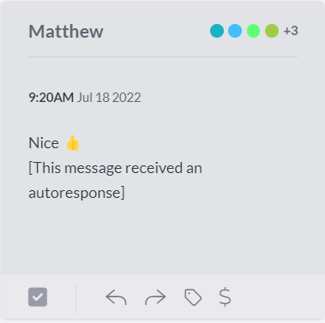
Contact Tags can be found in most places where a Contact Name appears — in your Conversation Views, headers of message threads, Contact Details — as well as in many filter options. The example below shows Contact Tags in the top right corner of a Conversation Block when viewing the Conversation Queue.
Sort by Contact Tags
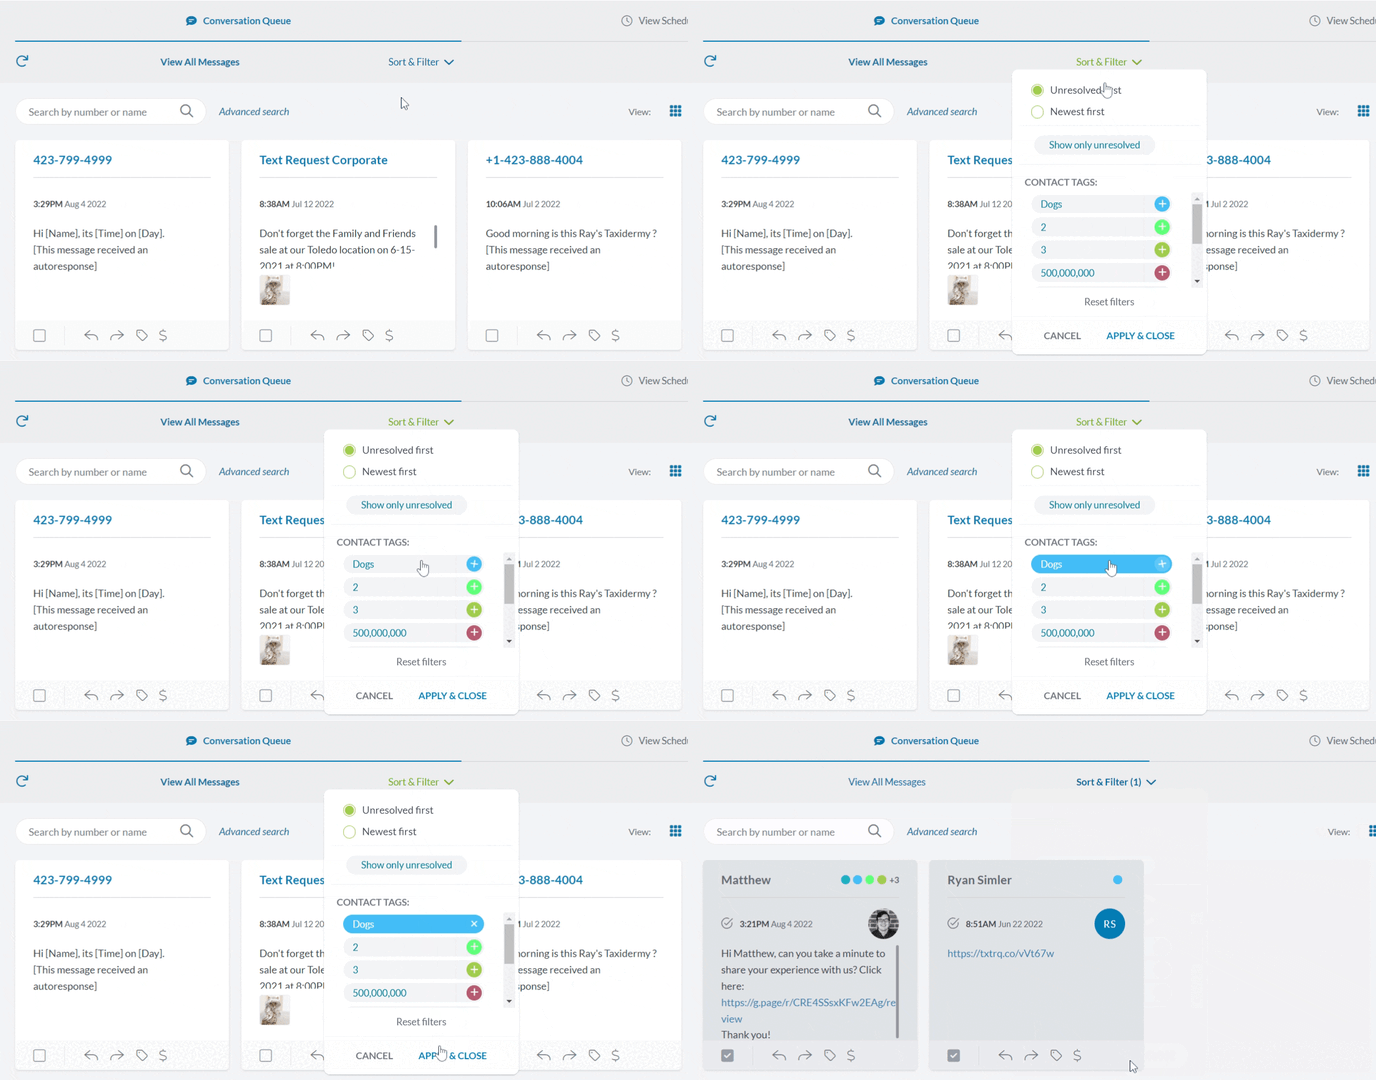
When viewing your messages, you can adjust the order they display by using the Message Filter. This allows you to sort by unresolved, newest, and Contact Tags.
To sort messages by Contact Tags:
1. Go to Messages.
2. Click Sort & Filter.
3. Click on the Contact Tag(s) you’d like to apply.
4. Click APPLY & CLOSE.
Maintain Filtered List
On the Conversations screen in Profile & Preferences, you can select which Contact Tags you want to see in your queue without having to refilter every time you visit the queue. You can select any tags across all available dashboards and change your selections whenever you want. This is a user preference, so any selections only impact the user's message queue.
To maintain Contact Tags:
1. Go to Profile & Preferences
2. Select Conversations.
3. Under Filter by Contact Tags, select the dashboard you want to filter. This defaults to your current dashboard.
4. Click the plus button next to the tags you want to filter by.

Your message queue will now only display contacts with the selected tags. You can deselect or select additional tags whenever you want by returning to the Filter by Contact Tags section.