Custom Fields
Custom Fields allow you to save general facts about your Contacts to help you better remember them on a more individual basis.
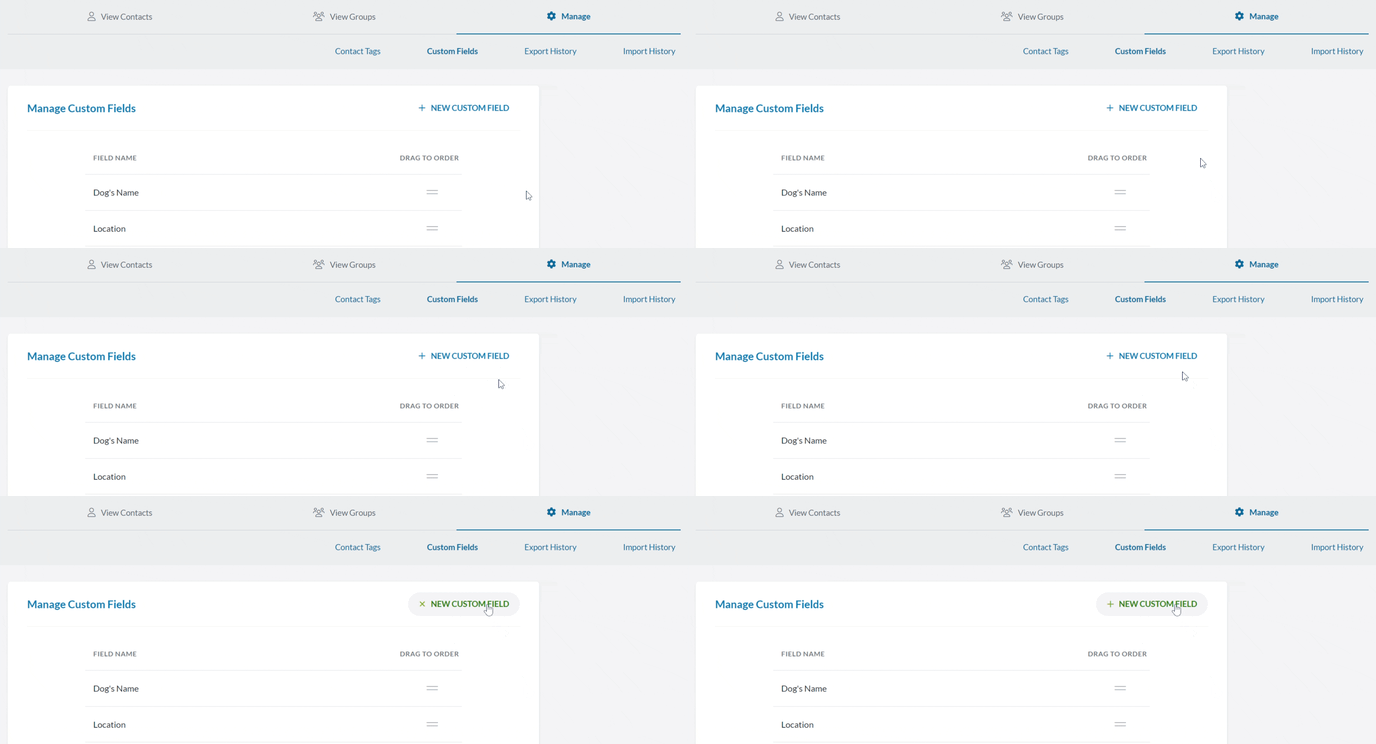
To create a New Custom Field category:
1. Go to the Contacts section of your Text Request menu.
2. Click Manage.
3. Click Custom Fields.
4. Click + New Custom Field.

Managing Custom Fields
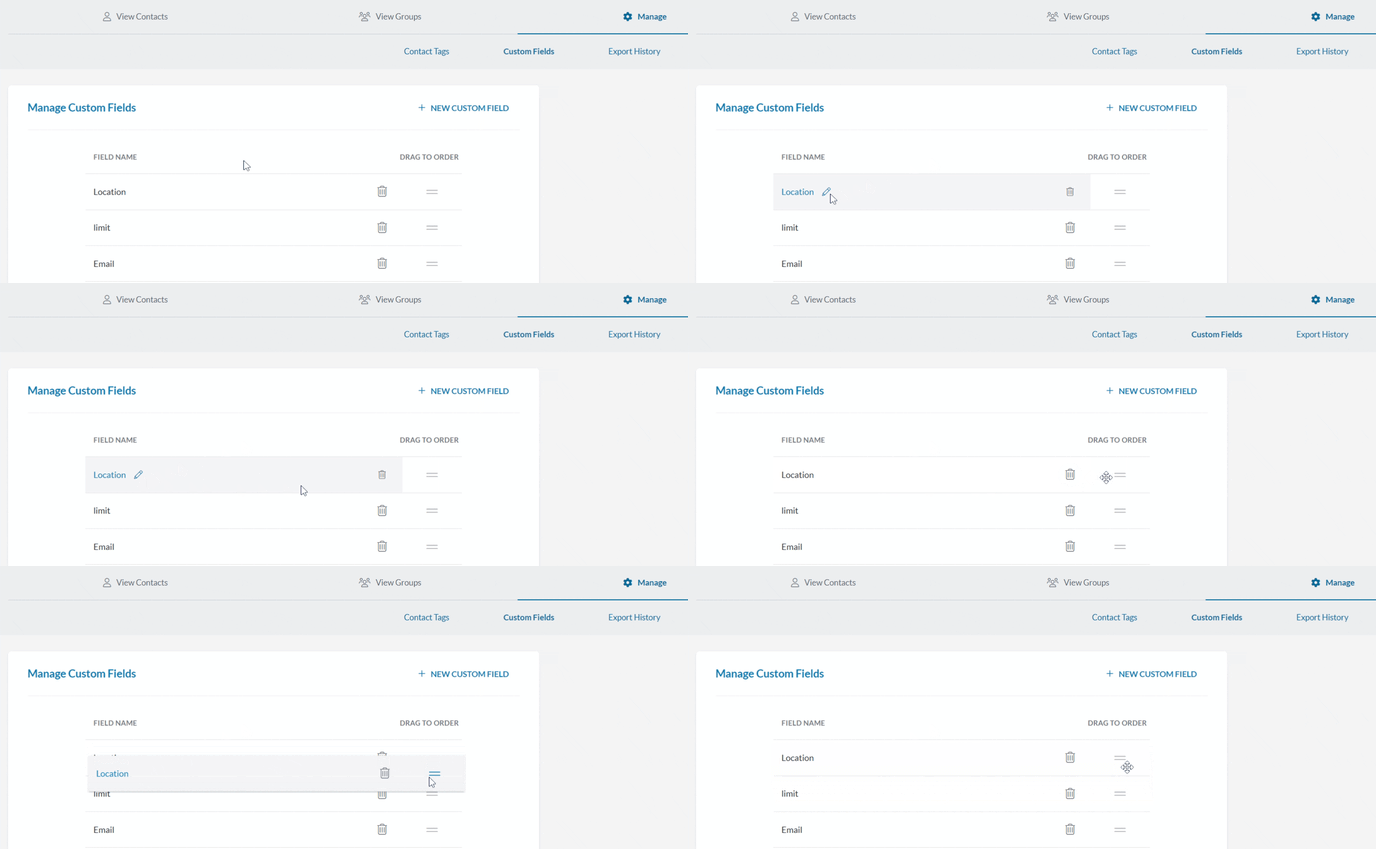
To edit a custom field, hover over the custom field and click the pencil icon.
To delete a custom field, click the trash bin icon.
To move a custom field, click the two lines icon and drag it to your preferred position.

Note: Any changes you make to a custom field's name will automatically be applied to all of your contacts, so be sure to update their information accordingly. For example, if you change a custom field category name from “Favorite Color” to “First Job,” the contacts with favorite colors listed in their details will still have that information in that slot (First Job will say purple).
Editing Custom Field Information
You can edit an individual Contact’s Custom Field information at any time from anywhere in Text Request that shows contacts. This includes the Contacts section itself, as well as the Conversation Queue, and even within a Conversation Block.
1. Click the contact's phone number or name to open its details.
2. Click the Custom Fields dropdown.
3. Edit any custom fields you want.
4. Click Save Edits.
