Message Personalization
Message personalization covers all of the features in Text Request that allow you to make your messages unique and personal for your contacts.
Custom Signatures
Each user can create as many custom signatures as they want. You can have a default signature go out with every message or choose not to include a signature at all. When composing a message, you can also add different signatures to each message.
To create a Custom Signature:
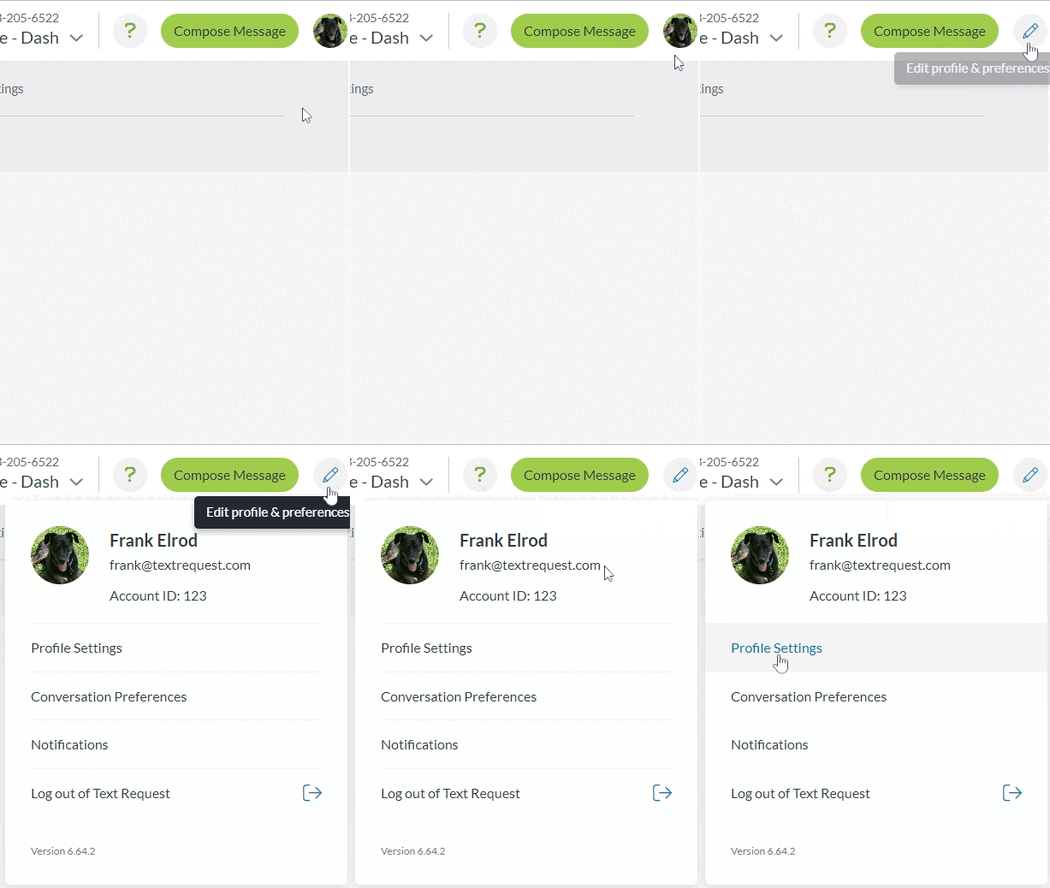
1. Open your profile & preferences modal.
2. Select Profile Settings from the list.
3. In the Signature section, type your new signature in the relevant field.
4. Press Enter to save your new signature.
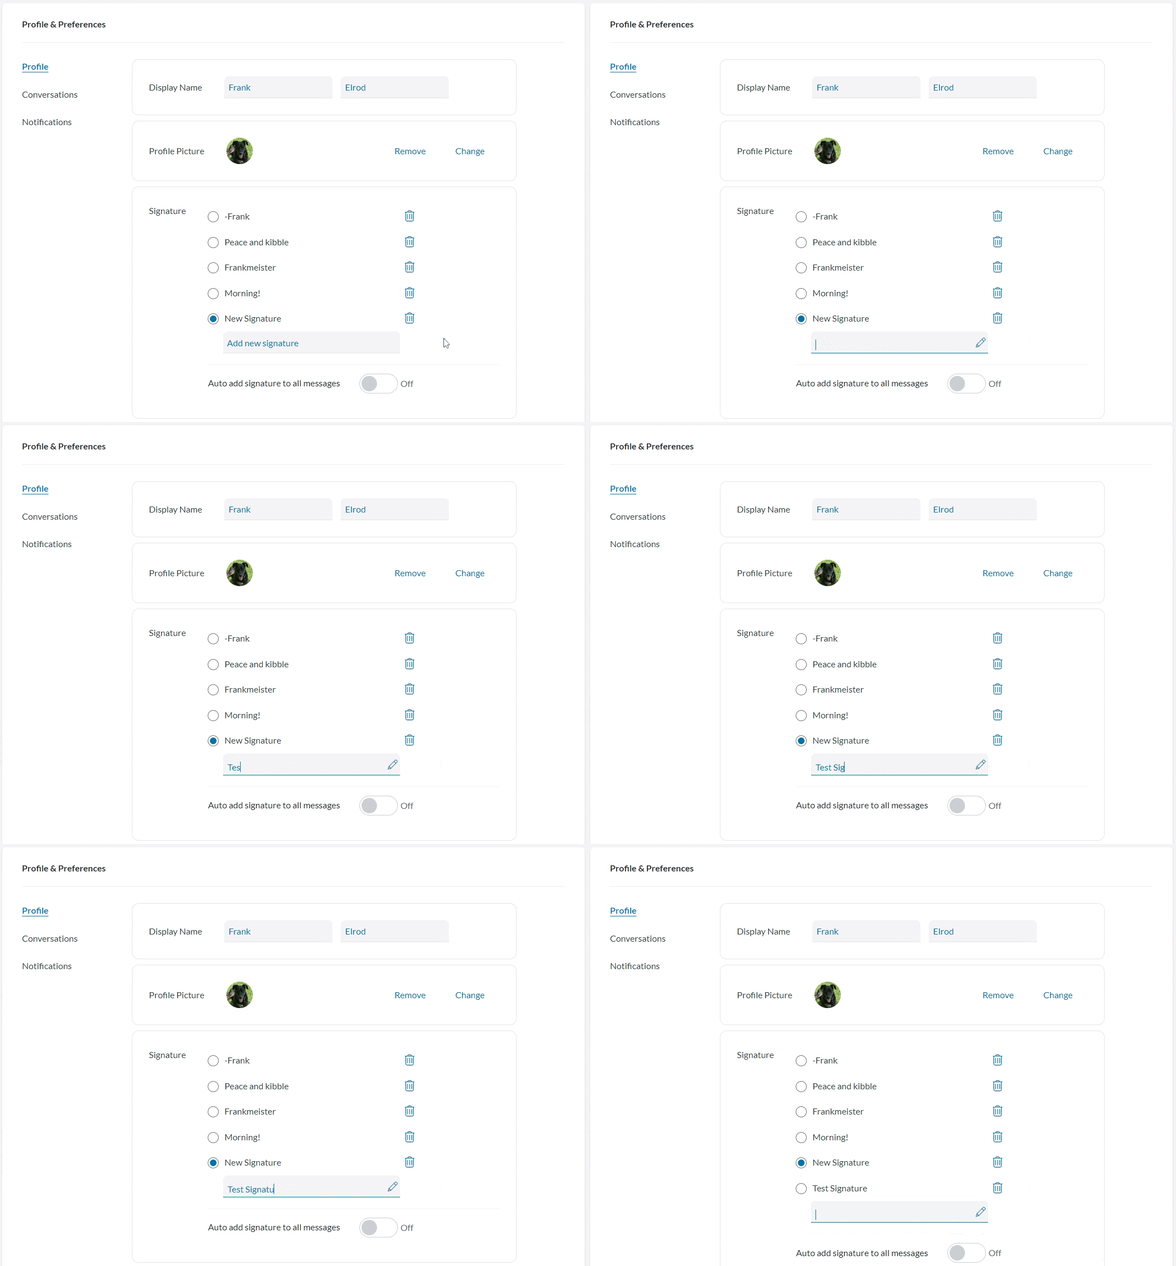
5. Repeat steps 3 and 4 to add additional signatures to your list.
Attachments
Whenever you compose an individual message, template, peer to peer campaign, or group message, you will be given the option to include an attachment.
Text Request supports GIF, JPG, PDF, and PNG files with three easy ways to attach them.
1. Select the paperclip icon, then browse and select your image.
2. Drag and drop the image.
3. Copy and paste the image directly into the message.
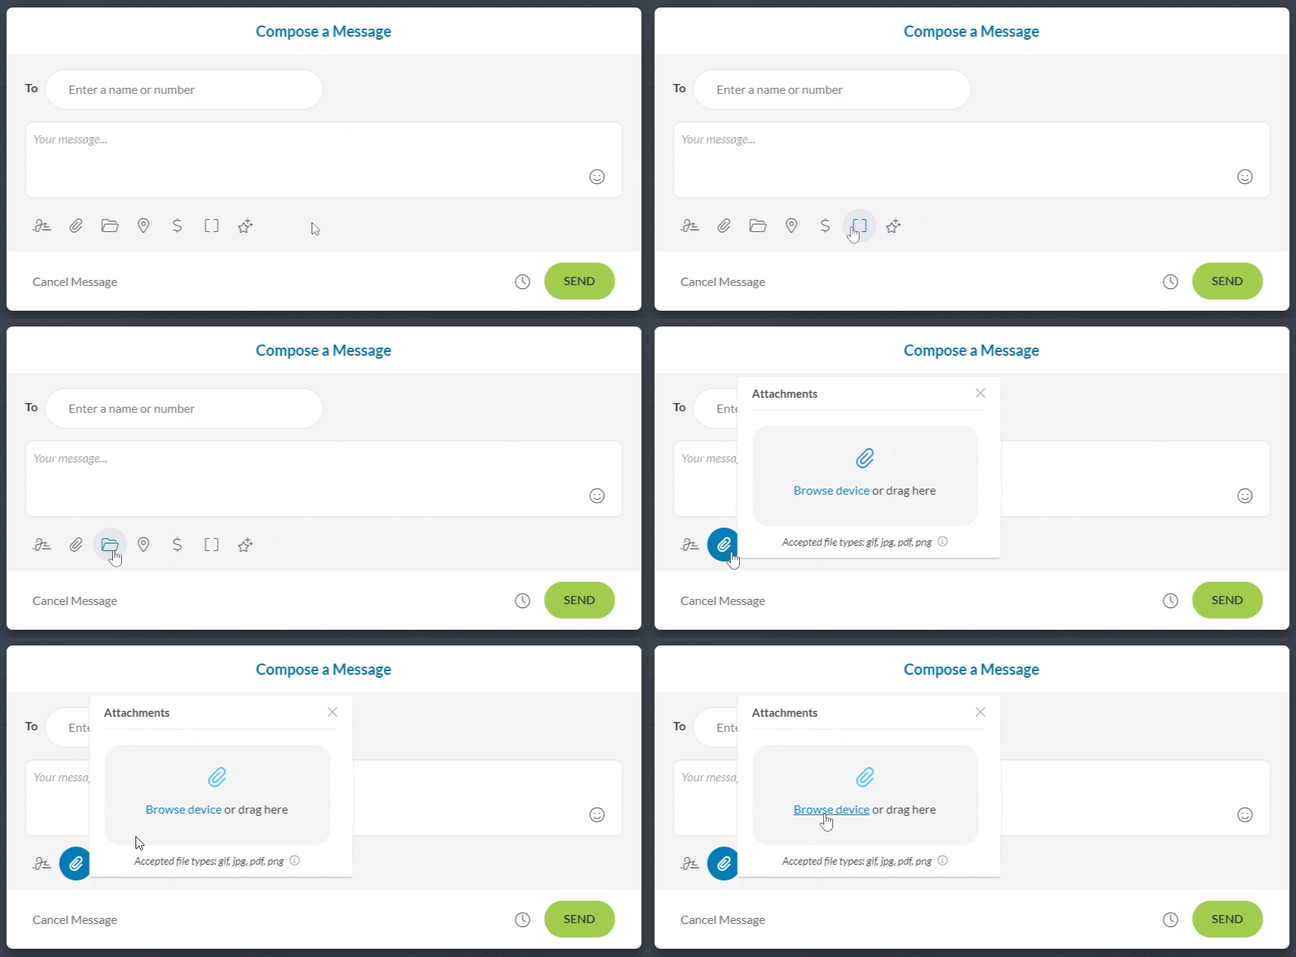
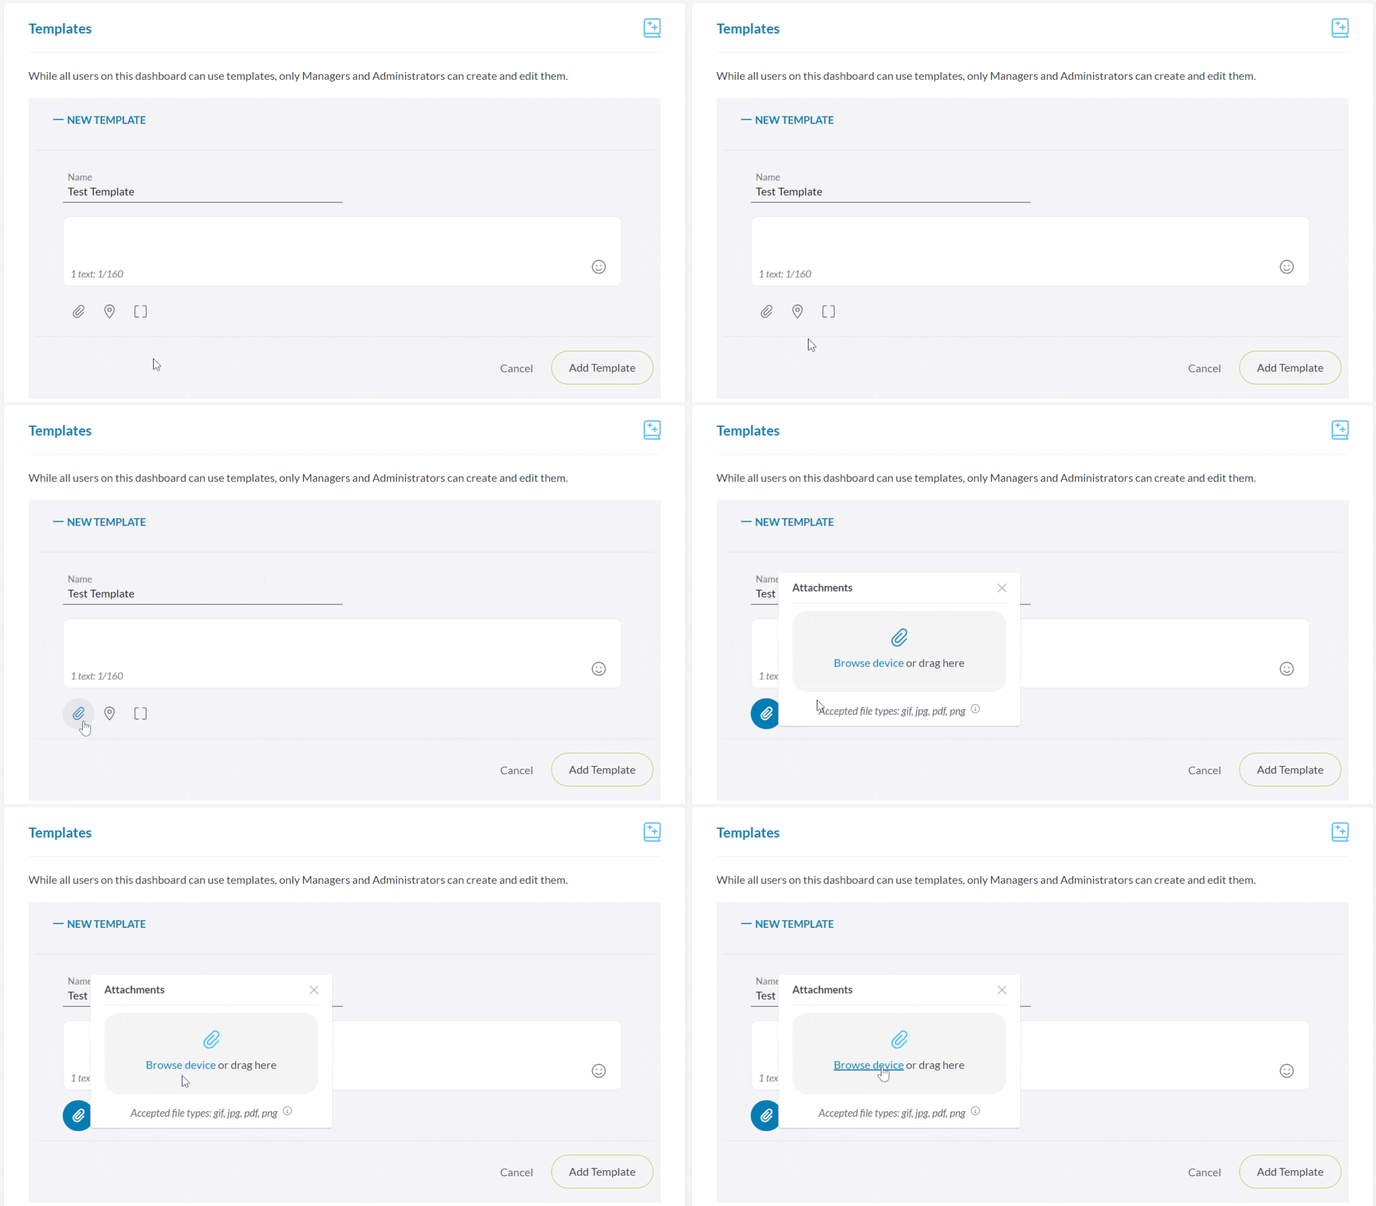
Check the size and type of file before you send the attachment. Text Request supports GIF, JPG, PDF, and PNG files. Most carriers only support files that are under 1 MB, and anything larger will be compressed in a way that affects the quality. PDFs can't be compressed the same way other images can and have a max file size of 675 KB.
Emoji Characters
Emojis are a great way to add character to your text messages and help them stand out from the crowd. Be aware, excessive or repeated emojis can trigger spam filtering. We recommend using them sparingly and never repeating the same emoji.
Note: Using an emoji changes the way your message is encoded, which will reduce your character count from a max of 160 down to 70.
To add Emoji Characters to your message:
1. Compose a new message.
2. Click the smiley face in the message field (Desktop) or use the built-in emoji keyboard (Mobile).
3. Click on the emoji(s) you want to add to your message.
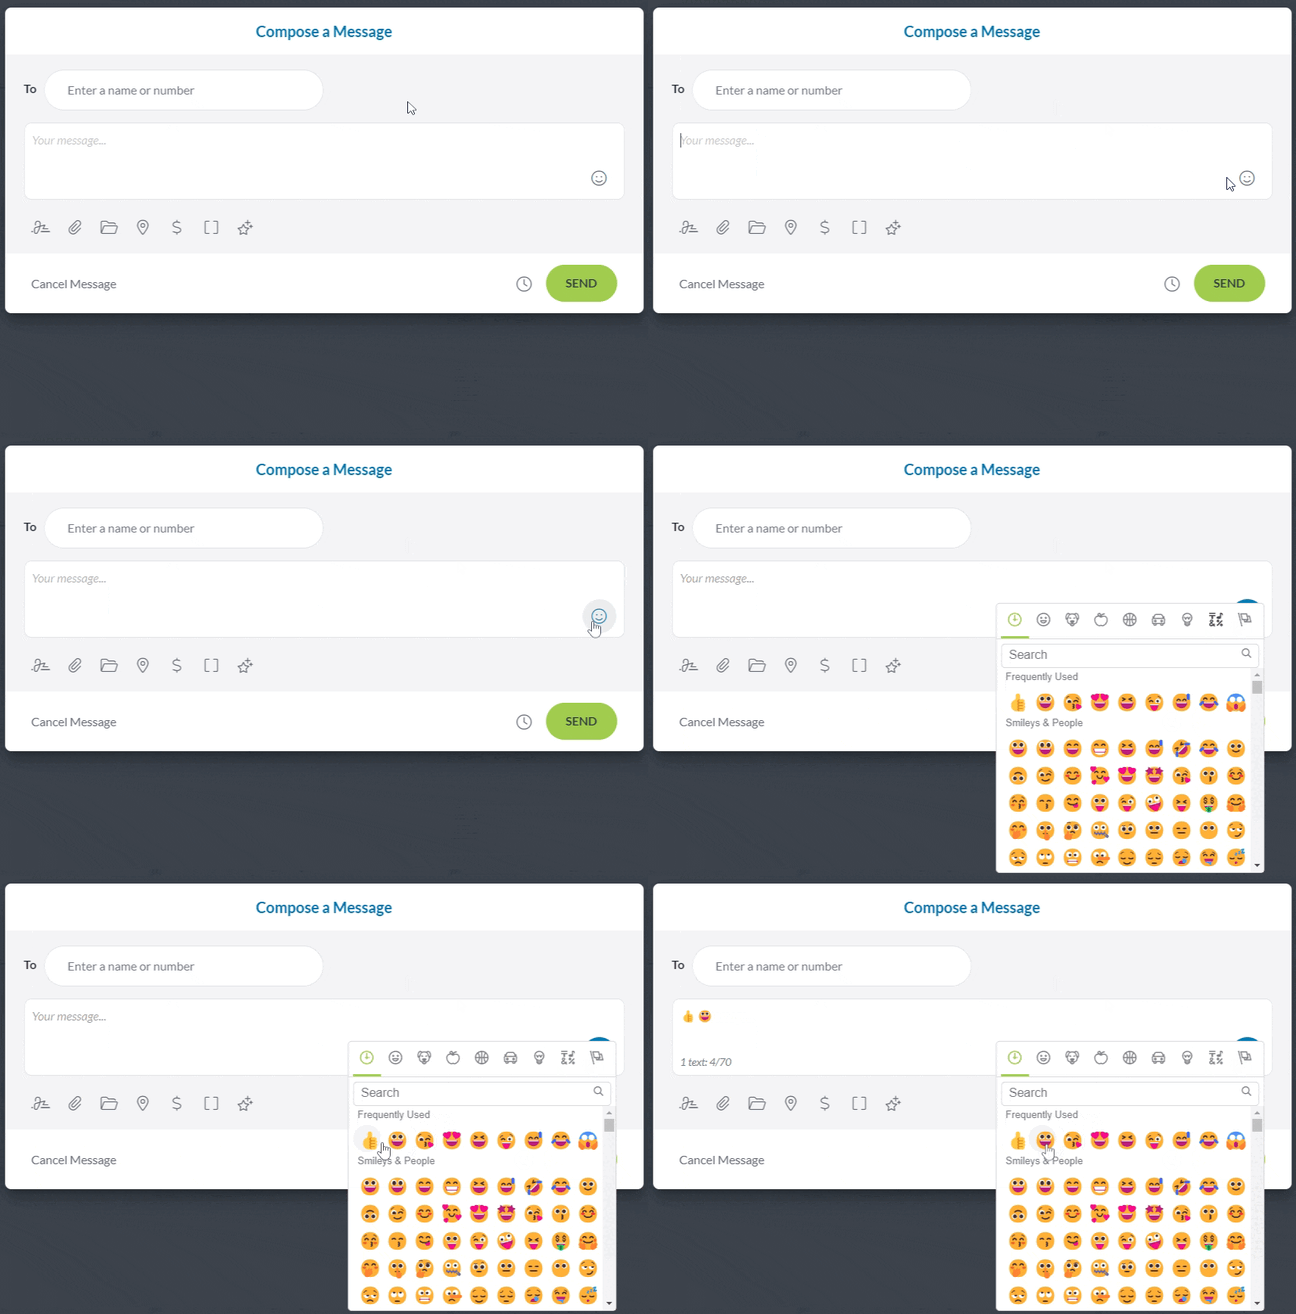
Emojis can also be added in a reply if you already have a conversation with a contact.
Custom Merge & Merge Fields
Merge Messaging is accomplished in two ways:
1. Custom Merge
Custom Merge (formerly Text Merge/Group Merge Messaging) uses a spreadsheet (.csv or .xlsx file) to send a group message with customizable fields that allow you to personalize each message to the individual receiving it.
Custom Merge is great for setting up appointments for different individuals or sending personalized invitations to an upcoming event. Visit our guide to Custom Merge for more examples and information.
To start a new Custom Merge:
1. Go to Group Messages under Messages.
2. Click Custom Merge Message.
3. Upload the .csv or .xlsx file of contacts you want to message.
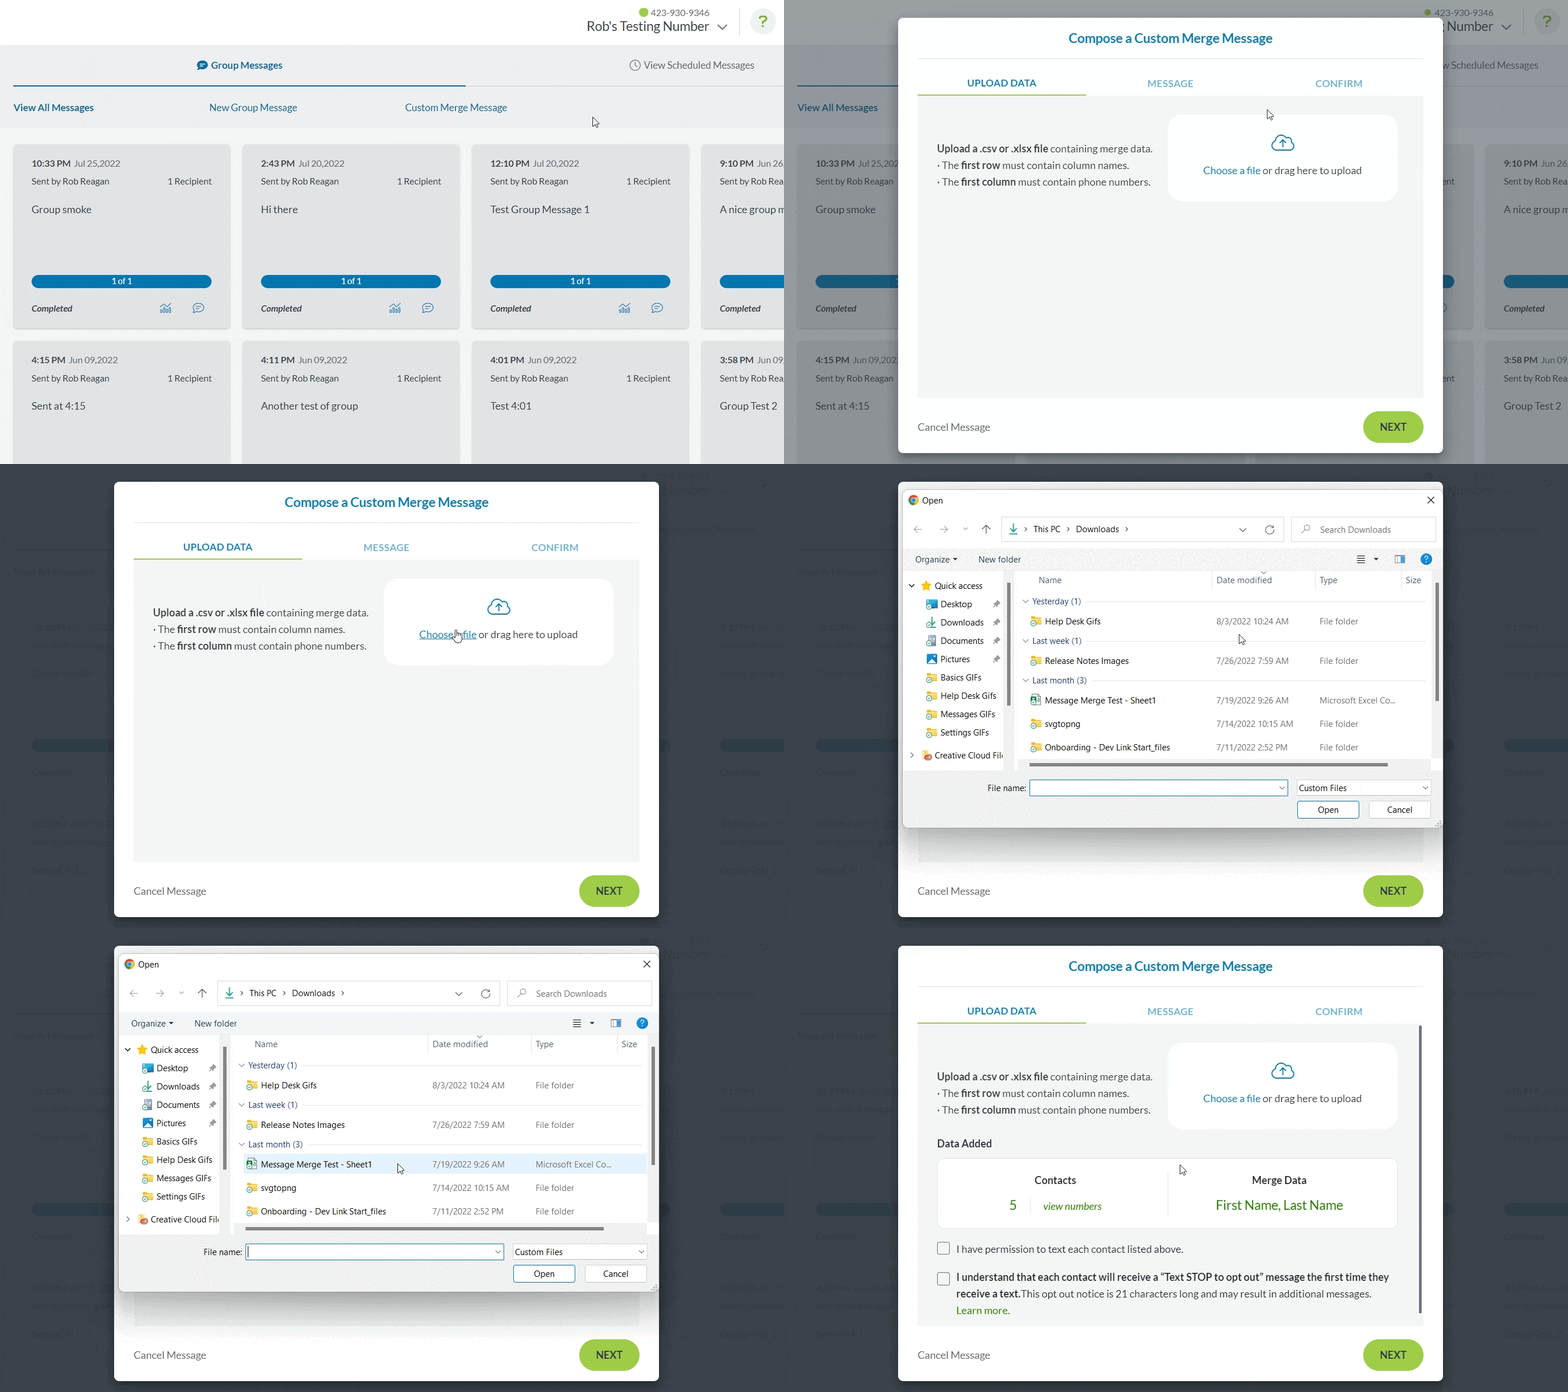
4. Confirm you have permission to message the contacts and click Next.
5. Compose your message, including any pre-saved signatures, templates, images, or scheduled time you want to add.
6. Select a Merge Field to insert that column's information into your message.
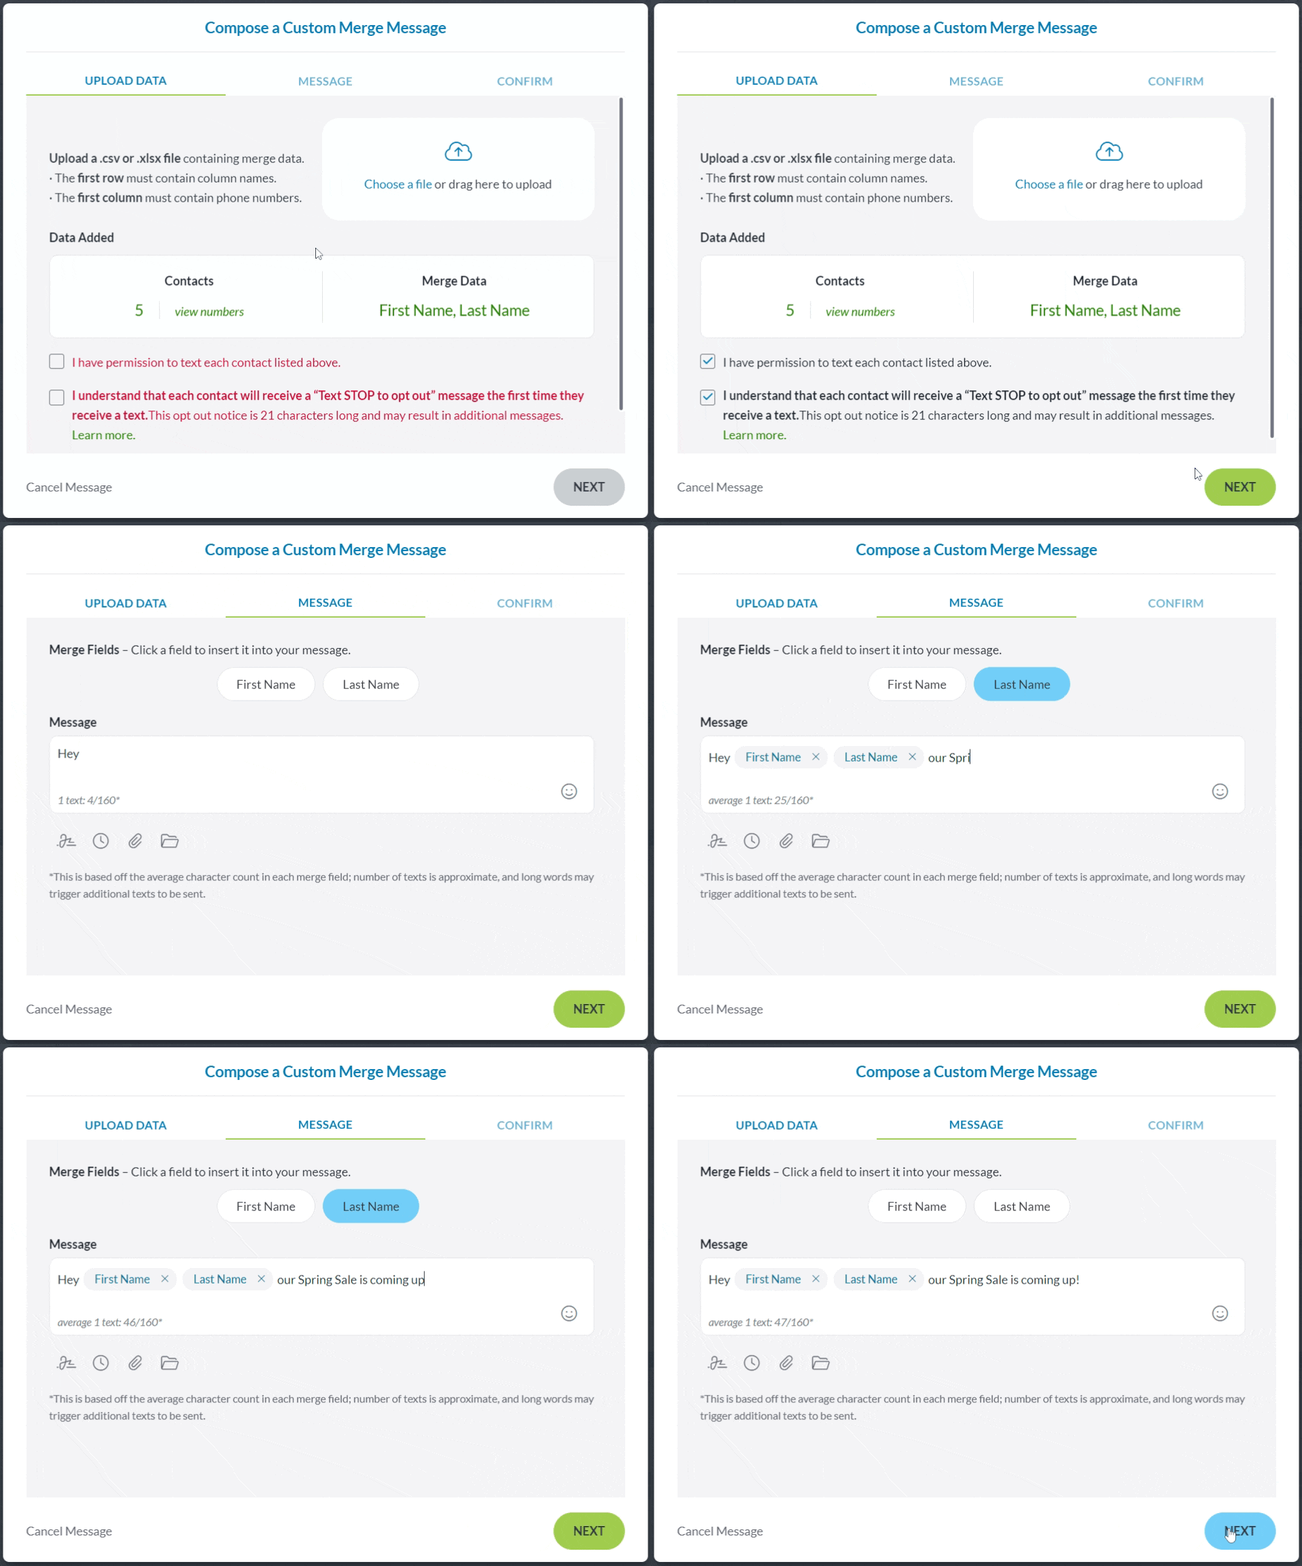
7. Click Next, and we will scan your message to make sure it won’t be flagged for spam.
8. Click Continue when the scan is complete.
9. Review your message, then click Send.
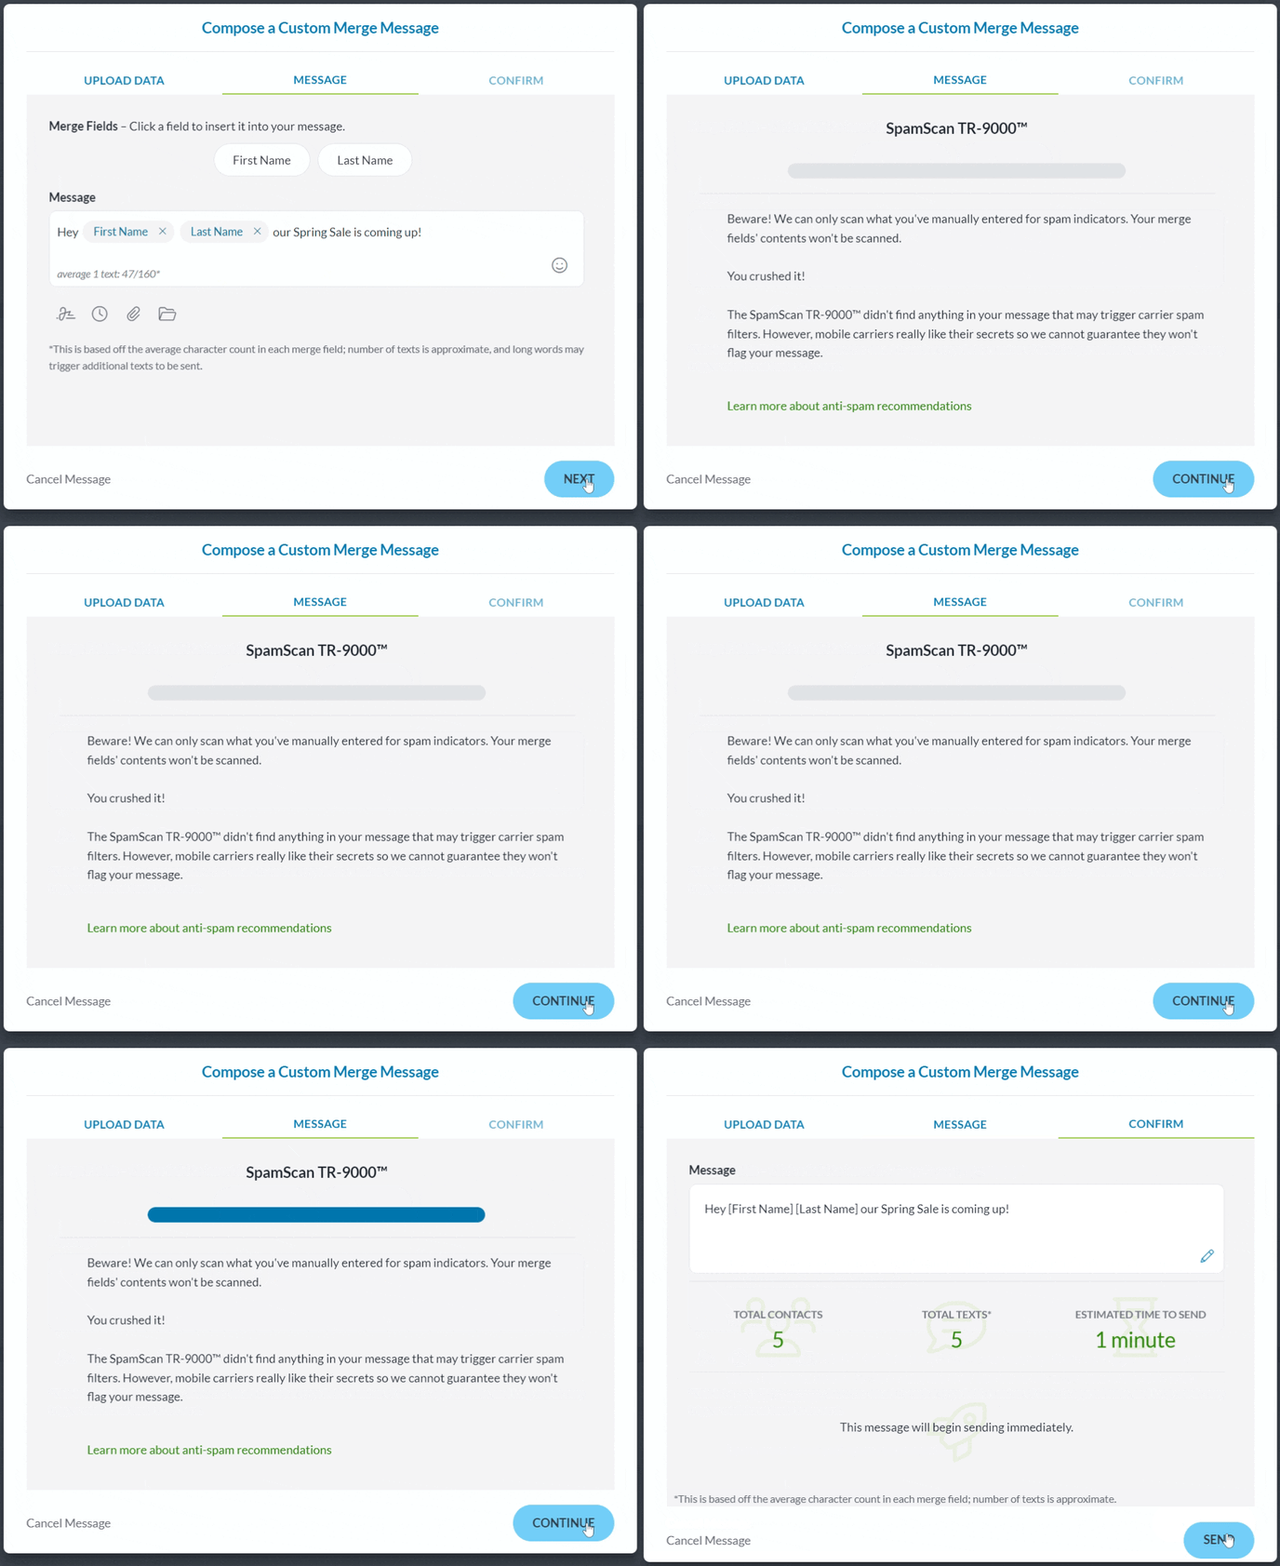
Note: Pay attention to the character counter below your message. Whenever you add a Merge Field, the average character count for that column is added to your character count. The final, actual number of characters and texts sent may be different than stated.
2. Merge Fields
Merge Fields allows you to personalize messages to different contacts based on the information you have saved to their contact card. Merge Fields can be accessed in Compose Message, Templates, or replies in Conversation Blocks. They are not yet available for Peer to Peer Campaigns or Group Messaging.
To add merge fields to a new message:
1. Click Compose Message.
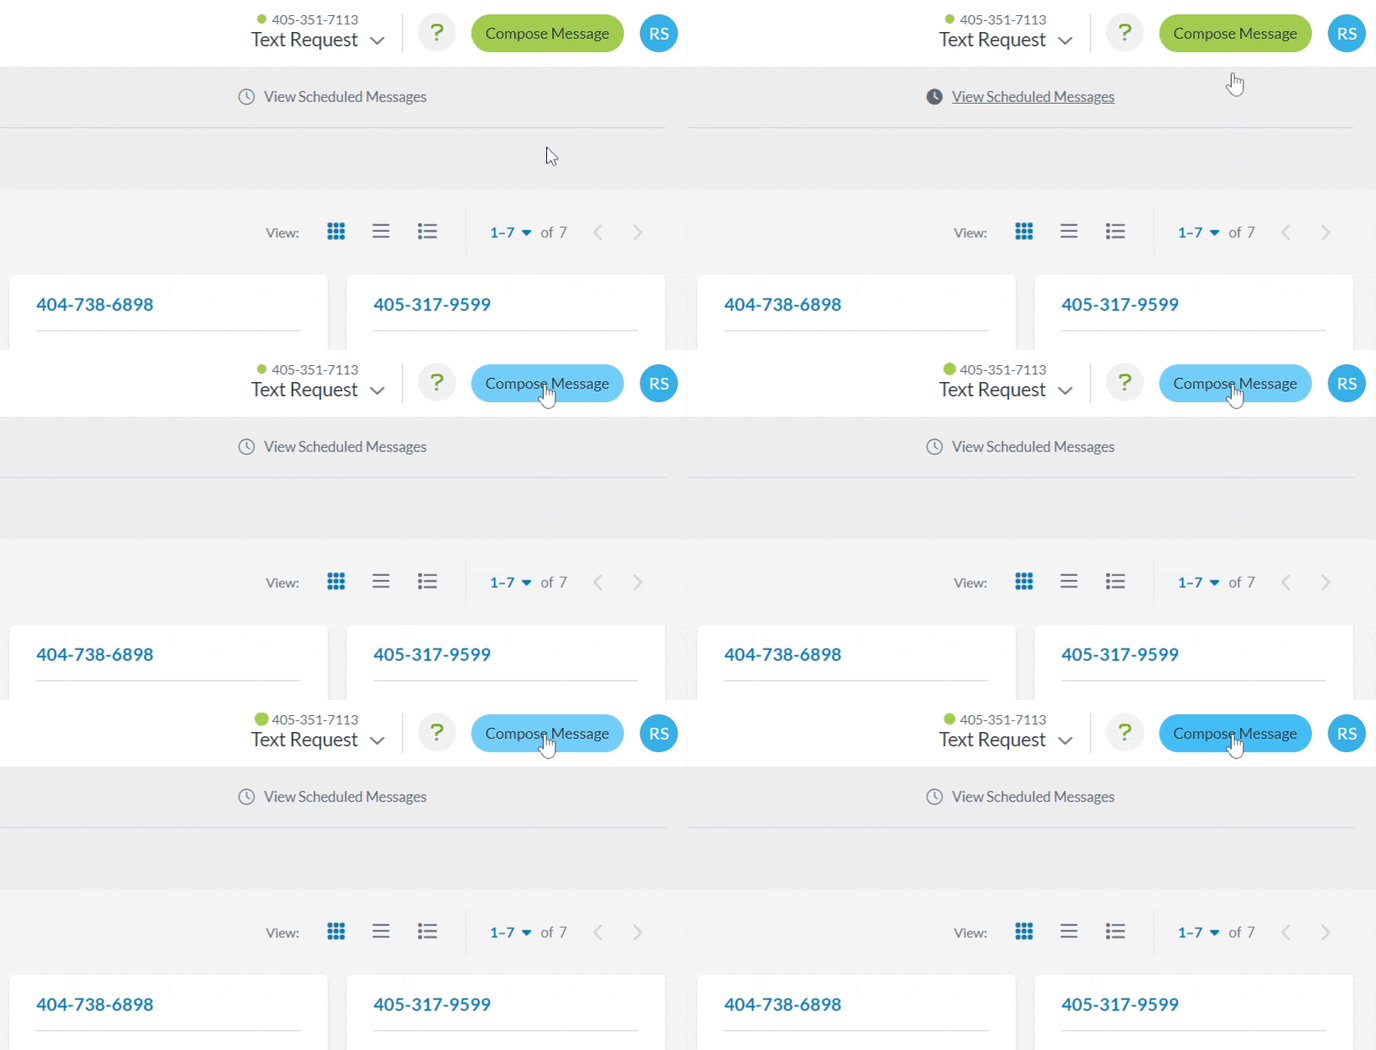
2. Add a Contact you want to message.
3. Click the [ ] icon.
4. Click the Merge Field you want to add to your message.
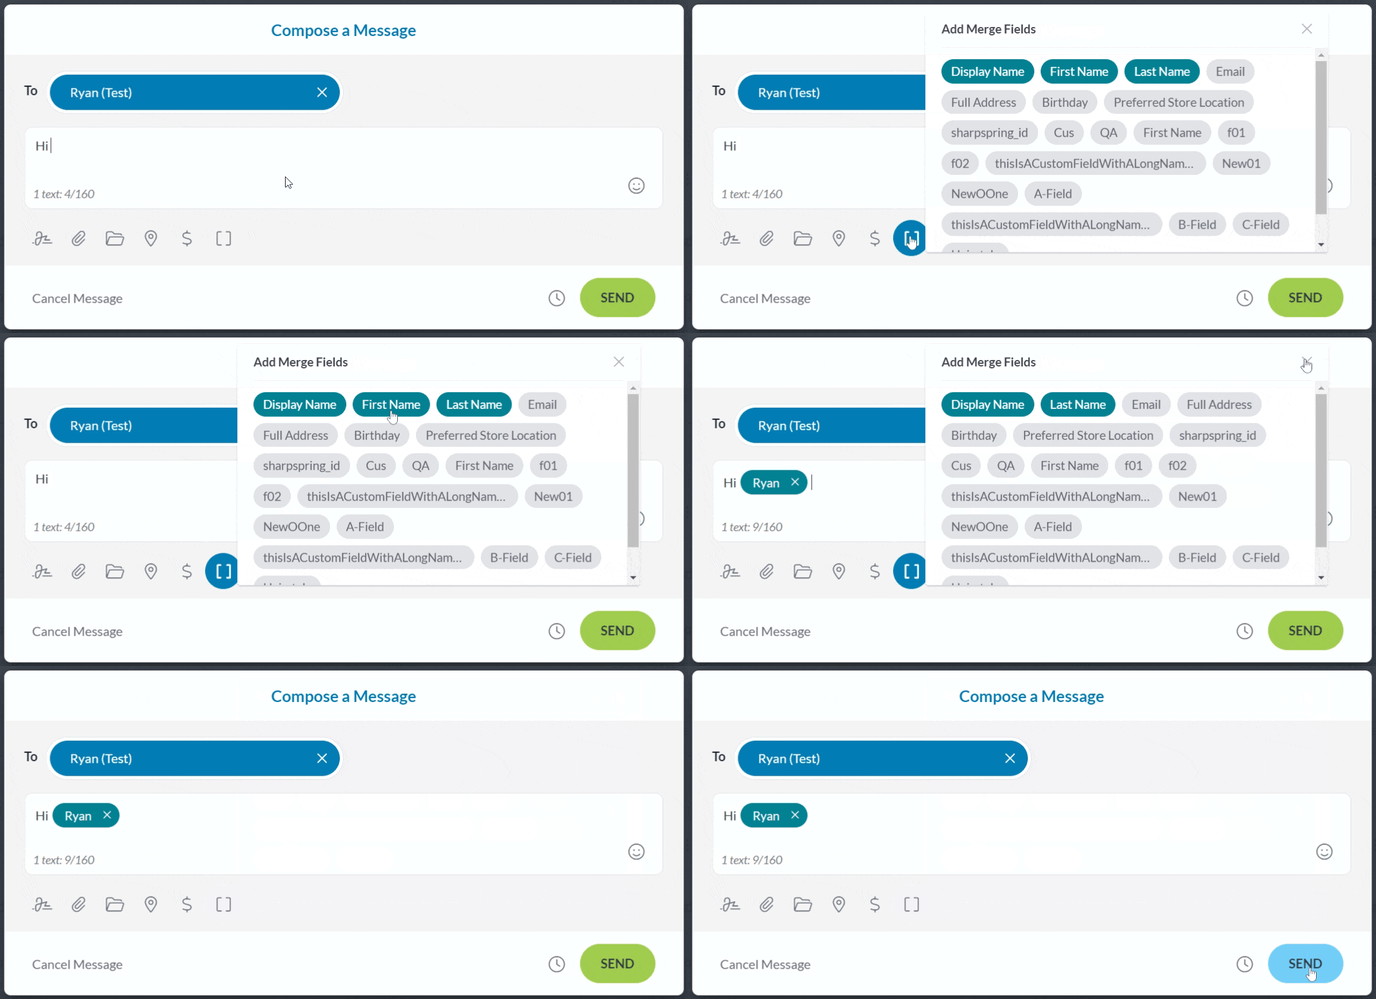
Defined Chip Undefined Chip
A teal merge field is known as a Defined Chip, whereas a gray merge field is known as an Undefined Chip. If a chip is defined, it means the information you’re trying to insert with a merge field is found in that contact’s details.
For example, if you have the contact’s first name in their contact details and click on the First Name merge field, the chip will be teal with that contact’s first name. When you add merge fields to a message, all of the chips must be defined or the message won’t send.
Learn more about Merge Fields and how they can help by visiting our Merge Fields guide.

