Note: By default, Payments will be disabled on all dashboards for an account and must be enabled on a per-dashboard basis.
To enable Payments:
1. Go to Payments.
2. Select Payment Settings.
3. Toggle Dashboard Settings to Payments Enabled.

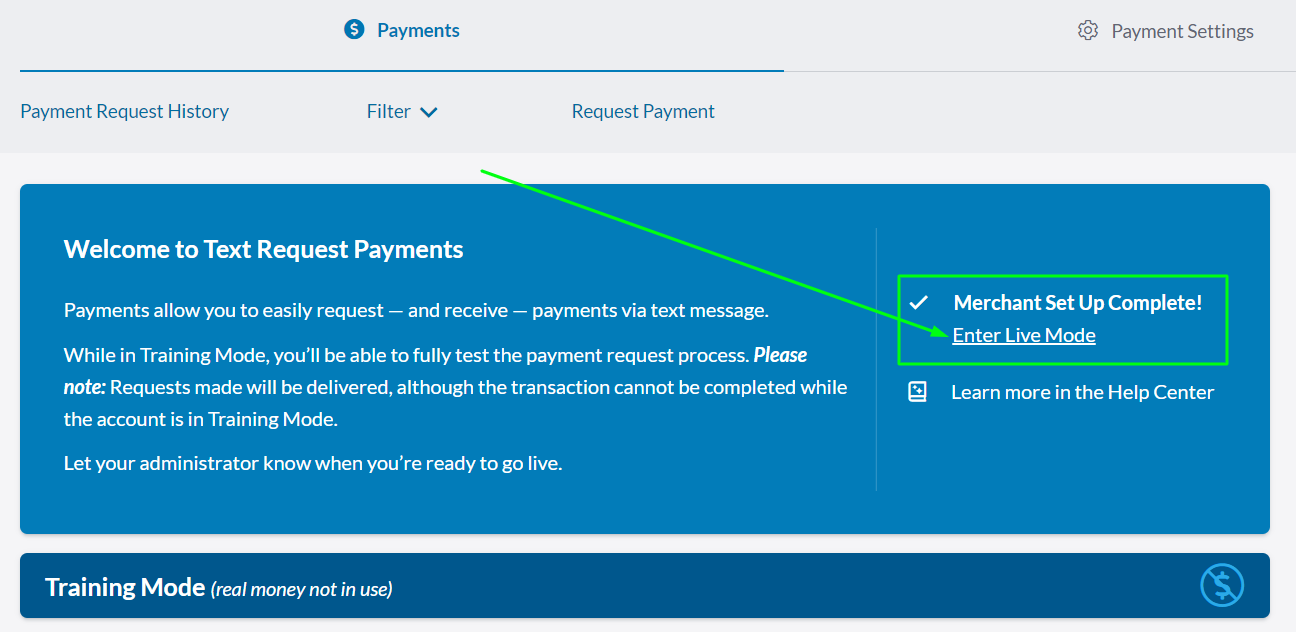
Your dashboard will now be in Training Mode, which allows you to fully test the payment request process before getting real money involved. Any Payment Requests made during Training Mode will be delivered, but the money won’t be processed. Training Mode will always be marked by a blue banner.

Note: Once you leave Training Mode and enter Live Mode, you cannot go back. We recommend sending a few test payments before you complete the next steps.
Merchant Set Up
You do not need to complete Merchant Setup to send test payment requests, but you must complete Merchant Setup to enter Live Mode.
Part of completing setup includes creating a Merchant Account with our partner, Authvia. Authvia links your Text Request account to a payment processor that connects to your bank so your payments can be processed.
You can only have one Merchant Account. If you manage multiple businesses under one Text Request account, you will need to split those off into additional accounts to use Payments.
To complete Merchant Setup:
1. Click Merchant Setup.
2. A new window will open and take you to Authvia.

From there, you will create an account with them. Their default payment processor of choice is Payrix, but you can also bring your own payment processor. Authvia will walk you through both options, which typically take 24 hours to be approved.
3. Once Merchant Set Up is complete, return to Text Request and click Enter Live Mode.
Once an administrator selects the Enter Live Mode button, any payment analytics gathered during Training Mode will be reset. Once in Live Mode, you can begin requesting payments from your contacts. All payments made by contacts will be processed, and any sent messages will remain in contact conversations.
See our guide on Payment Requests..
Disabling Payments
Accounts can disable Payments on a per-dashboard basis in the Settings section of the Payments menu option. Once this is done, users will not be able to send out Payment Requests from those dashboards until Payments are enabled again.