All messages from SMS Chat appear in Conversations for the associated Dashboard. Your responses go to that person’s cell phone as a text just like a normal Text Request conversation.
Note: Only account Administrators and Managers can set up the SMS Chat widget.
To access the SMS Chat widget:
1. Make sure you’re on the dashboard you want to receive SMS Chat messages.
2. Go to your Integrations page.
3. Click Customize now on the SMS Chat tile.
Create the SMS Chat Widget
Before you add the widget to your website, you’ll want to make sure it looks and works the way that’s best for your company. The Text Request widget is customizable in a variety of ways, which we’ll break down below. All changes are reflected in the live preview screen as soon as you make them.
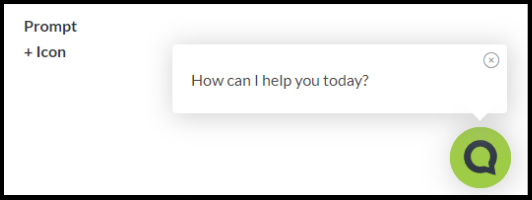
The Icon & Prompt
This is the first part of the widget website visitors will see. Customization options include:
-
Icon appearance (size, colors, or an uploaded image)
-
Optional prompt that appears after a set amount of time with a custom message
-
Where the prompt icon appears on your webpage
The Chat Form
The most important piece of the SMS Chat widget is the chat form.
Header: The top of your form, where you can customize what it says, as well as the background and text color of your message.
Custom Fields: All forms start with the basic fields of Name, Phone Number, and Message. You can add an additional two fields for whatever information you want to collect.
Message Routing: This allows your visitors to select which phone number/dashboard they want their message to go to. See below for how to set this up on your end.
Message Prefill: Activate this feature if you want visitors to be able to send a prewritten message to you without having to type their own.
Language: Select which language you want your chat form to appear in. Text Request currently offers English, Spanish, and French.
Send Button: Finally, customize the text and color of your send button to best fit your new, personalized chat form.
To enable Message Routing:
1. Toggle Message Routing on.
2. Open the Edit Field Name section.
3. Enter the name for this field. A popular choice is “location”.
4. Click Save.
5. Open the Select Dashboards to Include section.
6. Check the box next to each dashboard you want to offer as an option.
7. Open the Customize Dashboard Description section.
8. (Optional) Rename any of the selected dashboards. This helps users easily find the phone number/dashboard they want to contact.
9. Click Save.
Display Settings and Analytics
Last but not least, decide if you want your widget to appear only on the desktop version of your site or mobile as well. Then, indicate any website pages you don’t want the widget to appear.
Finally, enter your Google Tracking ID found in your Google Analytics portal if you want to use Google Analytics with your new SMS Chat widget.
Add SMS Chat to Your Website
When you finish building your widget and the live preview looks the way you want it, it’s time to add it to your website. If you use WordPress or Squarespace, there are slightly different directions below.
To add the SMS Chat widget:
1. Click Publish Settings to save your current version of the widget.
2. Copy the Code Snippet.
3. Paste the code directly into your website’s HTML in the Footer, just before the closing </body> tag.
4. Toggle your SMS Chat Widget on.

Your SMS Chat widget is now live on your website! You can change your settings at any time without having to touch the code again. Make your changes and select Publish Settings anytime you want to make an update.
To add the SMS Chat widget to WordPress:
1. Click Publish Settings to save your current version of the widget.
2. Copy the Code Snippet.
3. Log in to your WordPress account.
4. Go to Plugins.
5. Search for and install a plugin that allows you to add Javascript to your site. We recommend Insert Headers and Footers or Simple Custom CSS and JS.
6. Open the installed plugin.
7. Paste your SMS Chat code into the plugin.
8. Click Save.
9. Toggle your SMS Chat widget on inside the SMS Chat screen in Text Request.
SMS Chat is live on your WordPress site!
To add the SMS Chat widget to Squarespace:
1. Click Publish Settings to save your current version of the widget.
2. Copy the Code Snippet.
3. Log in to your Squarespace account.
4. Navigate to your Home Menu Settings
5. Select Advanced.
6. Select Code Injector.
7. Select Footer and paste in your SMS Chat code snippet.
8. Click Save.
9. Toggle your SMS Chat widget on inside the SMS Chat screen in Text Request.
SMS Chat is live on your Squarespace site!