Microsoft Dynamics 365 Integration
All messages sent to and received from your Text Request dashboards will sync with your Microsoft Dynamics 365 Sales contacts when this integration is active.
Note: The Microsoft Dynamics integration is a one-way street for changing contact information, including opt-outs. Contact information updated in your Dynamics account will automatically appear in Text Request, but any changes you make in Text Request will not impact your Microsoft Dynamics account.
To set up this integration:
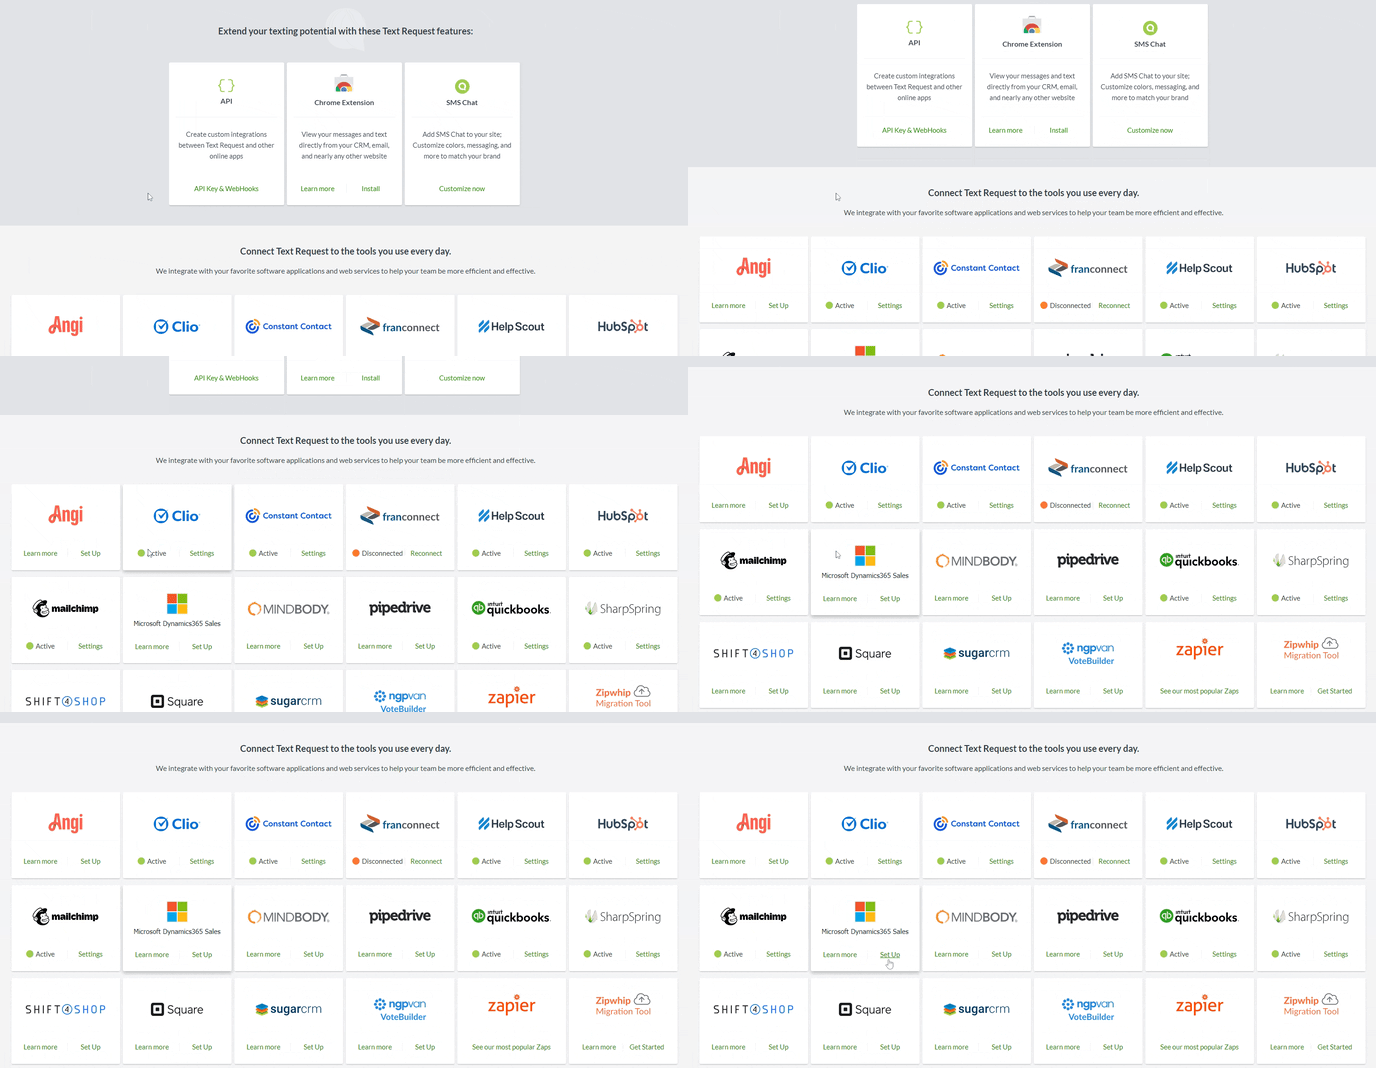
1. Go to the Integrations section of your menu.
2. Locate the Microsoft Dynamics 365 Sales integration box underneath the Everyday Tools section.
3. Select Set Up within the Microsoft Dynamics box.

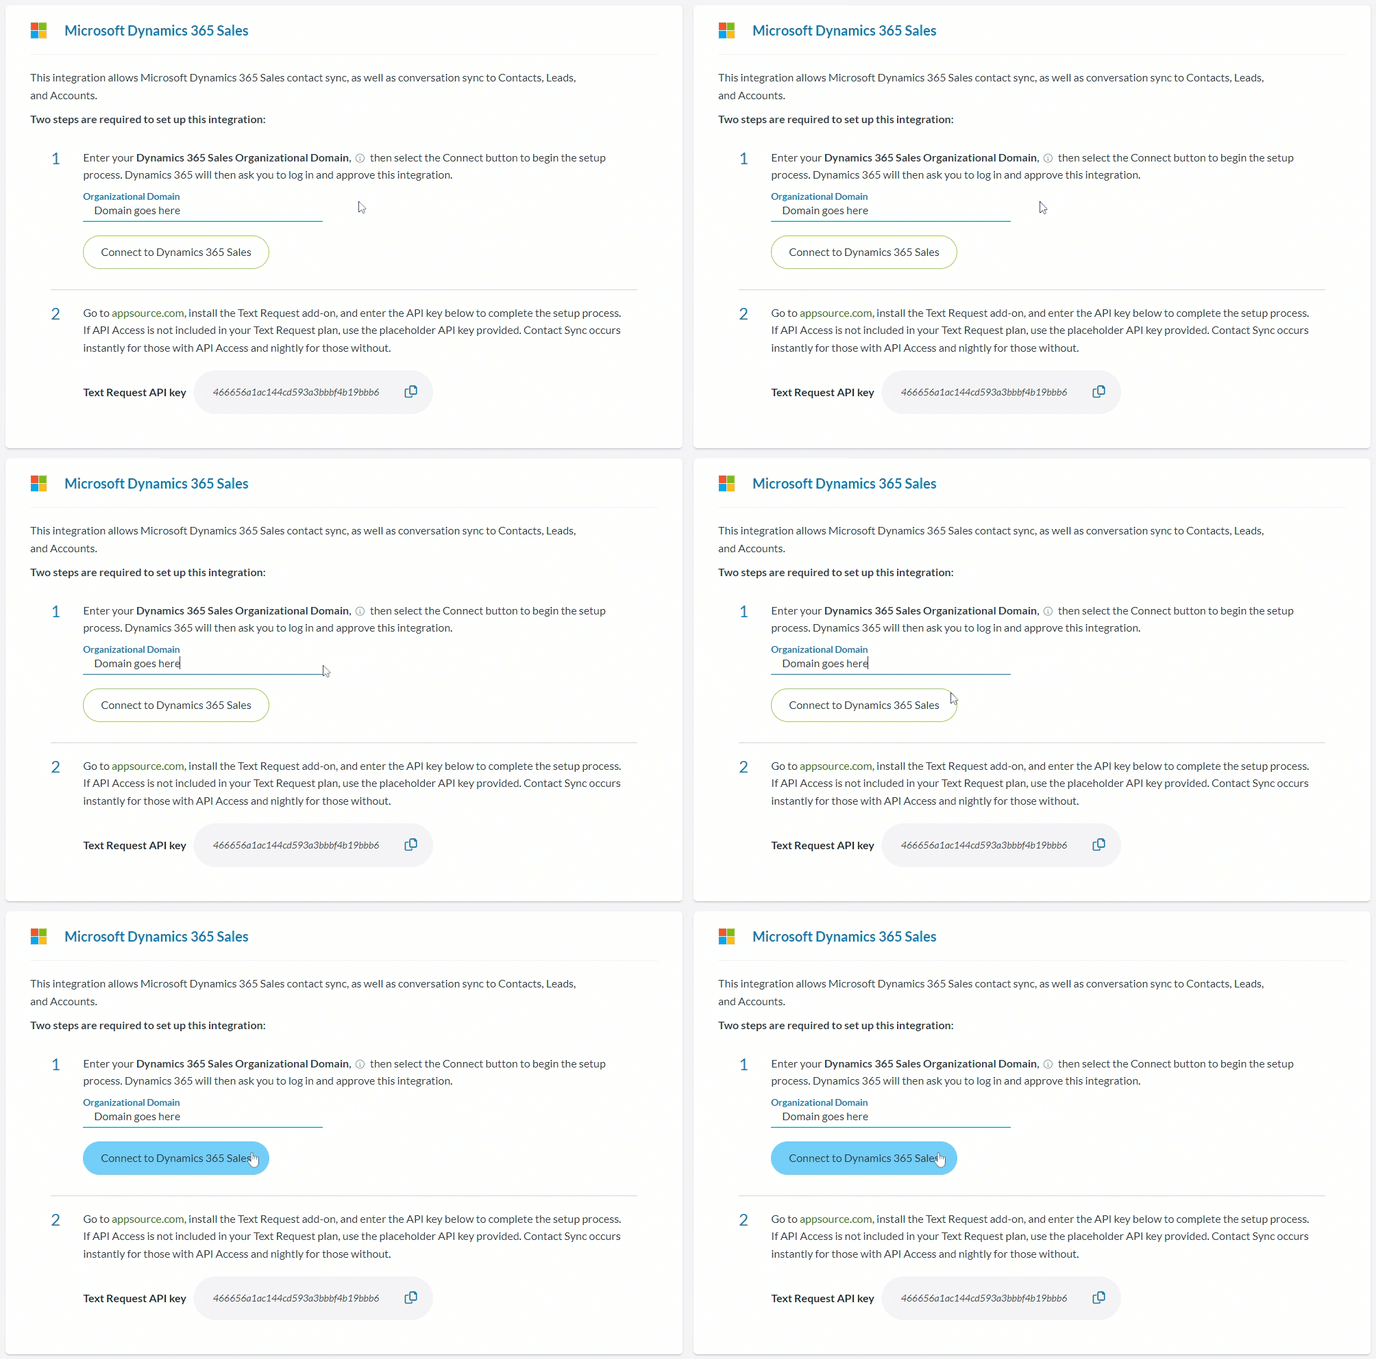
4. Enter your Dynamics 365 Sales Organizational Domain.
5. Click Connect to Dynamics 365 Sales.

6. Install the Text Request add-on from appsource.com.
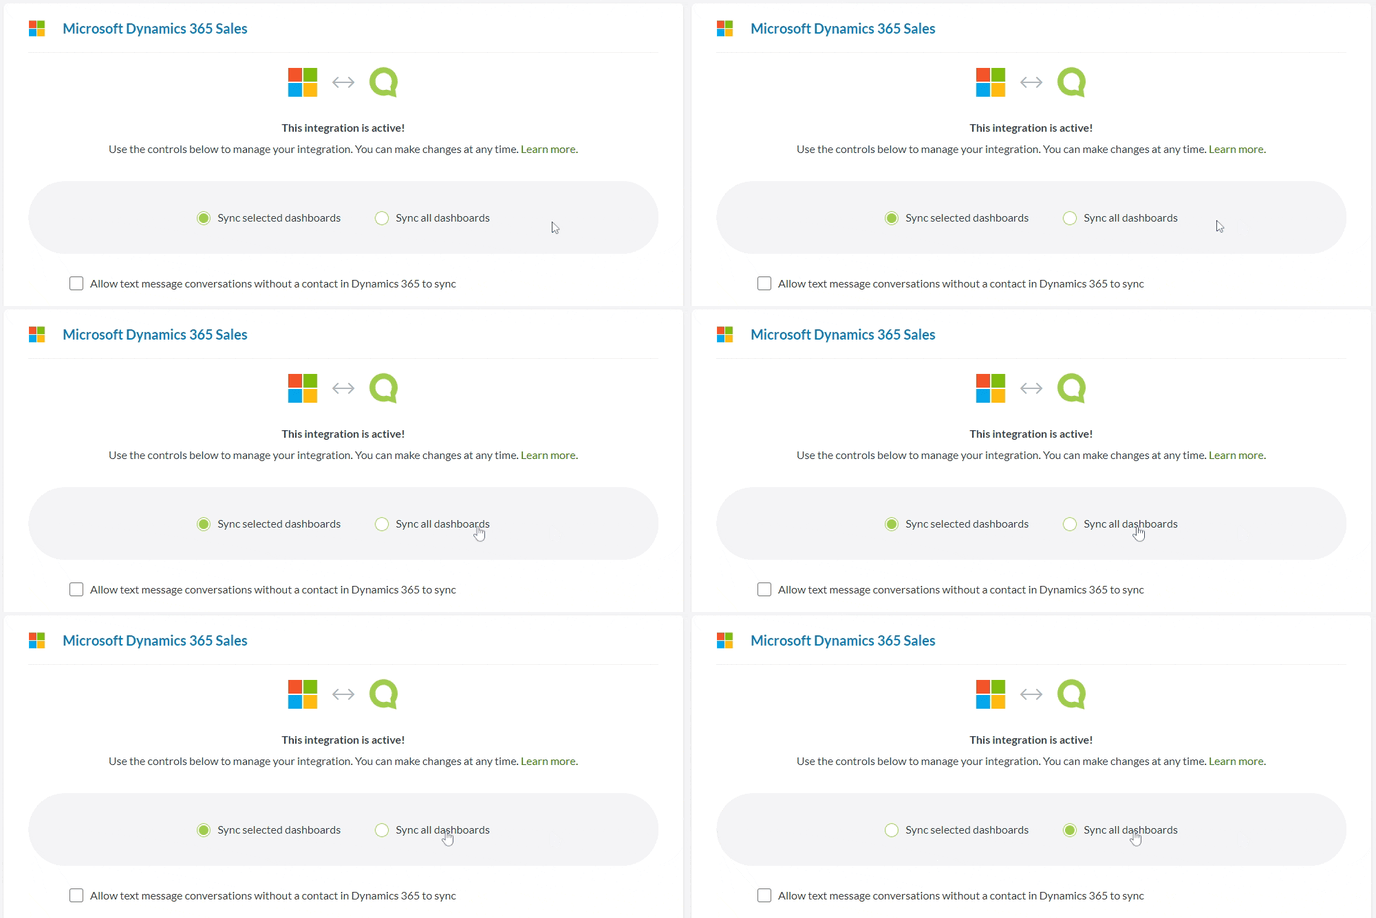
7. Check the box next to the dashboards you want to sync with this integration or select the Sync all dashboards button if you want to sync with all of your dashboards.
Once you’ve completed the setup for the integration, you can change which dashboards you want to sync with it at any time.
To edit the dashboards synced with this integration:
1. Go to the Integrations section of your menu.
2. Locate the Microsoft Dynamics 365 Sales integration box underneath the Everyday Tools section.
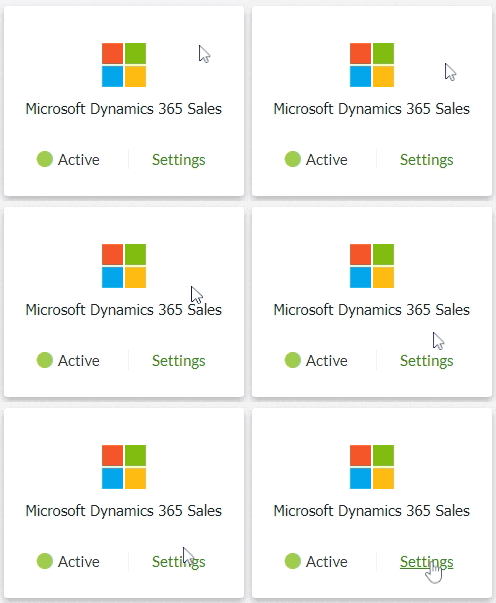
3. Select Settings within the Microsoft Dynamics box.

4. Select the edit button (pencil) next to either Contact Sync or Conversation Sync.
5. Check the box next to the dashboards you want to sync with this integration or select the Sync all dashboards button if you want to sync with all of your dashboards.

6. Click Save to apply your changes.
If you ever need to disconnect the integration, you just need to scroll to the bottom of the settings menu and click the Delete Integration button.
To disconnect this integration:
1. Go to the Integrations section of your menu.
2. Locate the Microsoft Dynamics 365 Sales integration box underneath the Everyday Tools section.
3. Select Settings within the Microsoft Dynamics box.
4. Select the Delete Integration button at the bottom.

5. Click Delete Integration in the new window to confirm deletion.