![favicon-256.png]](https://help.textrequest.com/hs-fs/hubfs/favicon-256.png?width=30&height=30&name=favicon-256.png)
Sequences center around defining an event. This can be an event in the future, or starting as soon as you activate the sequence. There are four steps to building a sequence, and we'll breakdown each of those steps below.
If you're looking for simple step-by-step instructions, scroll to the bottom of this guide.
Recipients
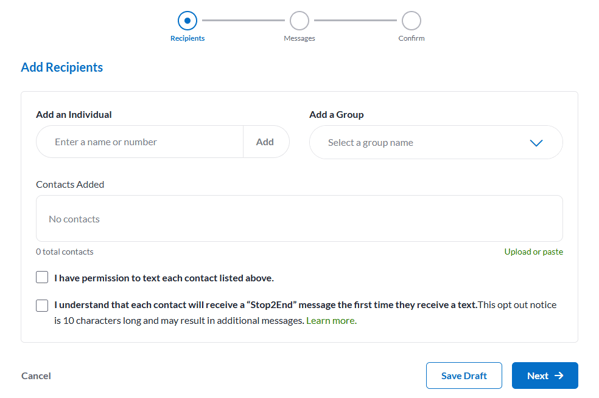
The Recipients step is where you enter who you want to send messages to. It functions exactly like the Group Message recipients step, and allows you to add groups and individual contacts.
To continue, you'll need to add at least one contact and check the boxes for permission to text and understanding the opt out notice.
Template
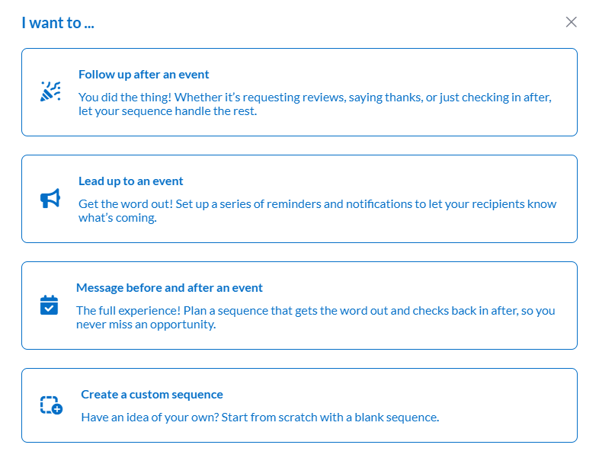
Between Recipients and Messages, a pop up will appear asking you what you want this sequence to do. Each option functions as a premade template to get you started quickly with your sequence.
Follow up after an event: This will start your sequence with a blank message set to send 1 hour after the event time.
Lead up to an event: This will start your sequence with a blank message set to send 1 hour before the event time.
Message before and after an event: This will start your sequence with two blank messages, one set to send 1 hour before the event, and the other set 1 hour to send after the event.
Create a custom sequence: This will start your sequence completely blank, allowing you to add messages before or after as you need them.
Messages
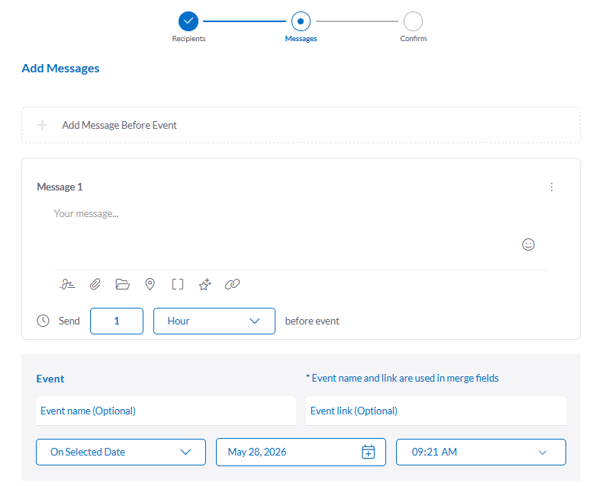
The Messages step is the meat and potatoes of your sequence, where you write your messages and build the schedule they'll follow.
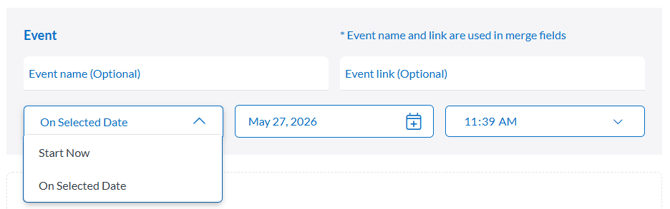
Event: This is the anchor of your entire sequence schedule and the time you set for it to start (whether specific date and time or immediately after activation) is what's used by all of the messages you write. Message scheduling offers 3 time intervals: hours, days, and weeks.
Days and weeks will send at the exact time your event is scheduled to start on the applicable day.
Example: If my store sale starts on May 28, 2026 at 8:30 AM and I want to send a message the day before to remind everyone, I would add a message before the event that is set to Send 1 day before event. My recipients would then receive that reminder message on May 27, 2026 at 8:30 AM.
Note: You cannot schedule a message to send before an event if that time has already passed or the Event is set to Start Now. We're still working on the time travel update.
Confirmation
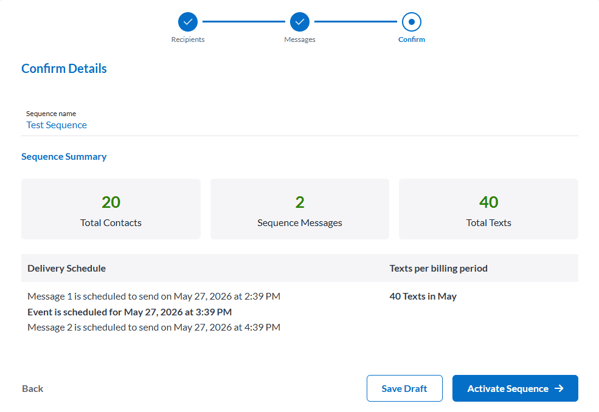
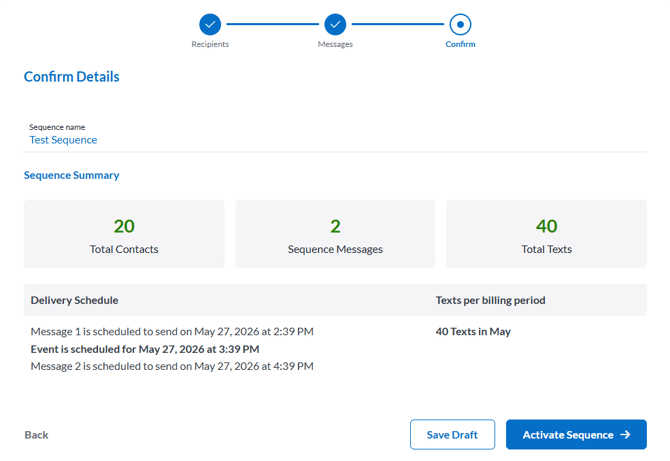
Once you've written your messages and built your sequence, the confirmation screen provides a brief overview of the number of messages that will go out over the entirety of your sequence.
This is also where you can add a custom name for your sequence. The system will default to the event date and contact group name if you don't.
Sequence Summary: Get a recap of the total number of contacts you're sending to, the number of messages in your sequence, and the total number of texts that will go out.
Remember, a text is 160 characters, so if a message in your sequence is lengthy, it will count as additional texts.
Delivery Schedule: You can see when each of your messages in the sequence is scheduled to send and the number of texts that will count towards your usage for that month.
Texts in a sequence only count towards your total usage when they send, not when you schedule the sequence.
To create a sequence:
1. Go to Sequences under Messages in the navigation bar.
2. Click + New Sequence.
3. Enter the recipients for your sequence. These can be individual contacts, groups, or a mix of both.
4. Check the boxes confirming you have permission and understand the opt out notice.
5. Click Next.
6. Select your reason for creating a sequence. Click Create a custom sequence if you want a blank slate.
7. Set the time and date your event starts. All messages will be sent relative to this time.
8. Add messages before or after the event.
9. Click Next once you have your messages set up.
10. Name your sequence.
11. Click Activate Sequence.
Your sequence is now scheduled to begin sending the first message based on the time you set up for the event, and when that first message should send.