
This integration enables SharpSpring contacts to sync with Text Request.
What does this integration accomplish?
Individual SharpSpring contacts will be automatically added to your Text Request account, and any contact lists in SharpSpring will create a matching Text Request Group. Groups are updated automatically each night.
Any contacts' phone numbers that only exist within Text Request will need to be manually added to SharpSpring.
Note: The SharpSpring integration is a one-way street for changing contact information, including opt-outs. Contact information updated in your SharpSpring account will automatically appear in Text Request, but any changes you make in Text Request will not impact your SharpSpring account.
All dashboards within your Text Request account can be synced with this integration once it’s live. You just need an admin level user within both Text Request and SharpSpring to set the integration up.
How do you set up this integration?
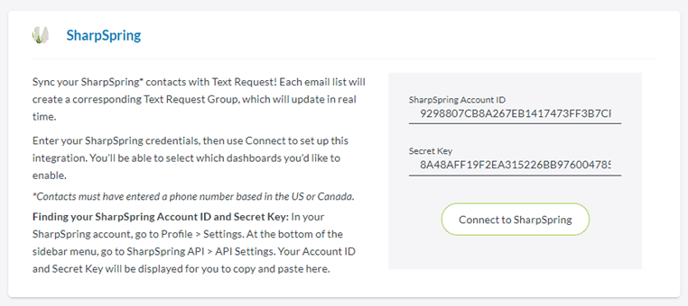
You will need to use SharpSpring Account ID and Secret Key to activate this integration (we’ll show you where to find those and how to use them next).
1. Go to your account profile in SharpSpring
2. Open the Settings section of your SharpSpring account
3. Scroll down to “API Settings”
4. Copy your Account ID and your Secret Key (you’ll need both for these next few steps)
5. Open a new window and log in to your Text Request account
6. Go to the Integrations section of your Text Request menu
7. Locate the SharpSpring integration box underneath the “Everyday Tools” section
8. Select “Set Up” within the SharpSpring box
9. Enter your SharpSpring Account ID and your Secret Key, then select “Connect to SharpSpring” on the new page that appears
10. The integration will now be active
To edit the dashboards that are in sync with this integration:
You can choose all or a subset of dashboards to sync with this integration. To do that:
1. Select “Settings” within the SharpSpring box in your Integrations section of your Text Request menu
2. Select between syncing “selected dashboards” or syncing “all dashboards"
Note that syncing to selected dashboards will add all your SharpSpring and email lists to this dashboard.
Selecting all dashboards will add all your SharpSpring and email lists to all Text Request dashboards.
If there is a duplicate contact in SharpSpring and Text Request, the Text Request contact information will be overwritten with the newly added contact’s details.
Contacts sync nightly, so if you set up this integration at 3pm on Thursday, for example, contacts will be synced and available for texting on Friday morning.
3. Check whether or not you would like for the synced dashboards to have contacts automatically removed from a group when they unsubscribe in SharpSpring
To set up a new visual workflow text automation:
1. Select the "+ New Automation" button
2. Type the name you want to identify the text automation with in Text Request
3. Select the dashboard you want the text automation to send from
4. Compose the message you send (including any custom fields or attachments you want to use)

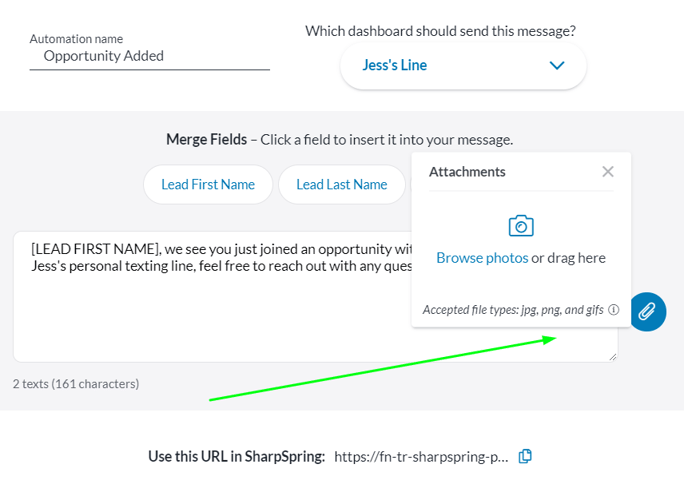
5. Copy the URL using the blue copy icon
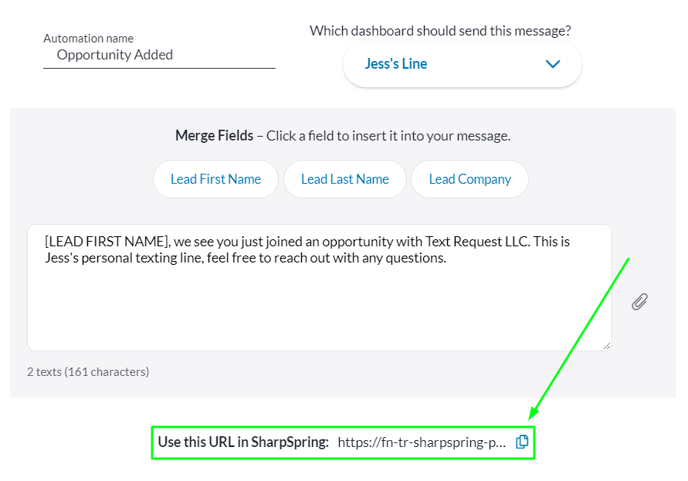
6. Go back to SharpSpring and paste that URL into the Configure Action of the workflow you want it to sync with
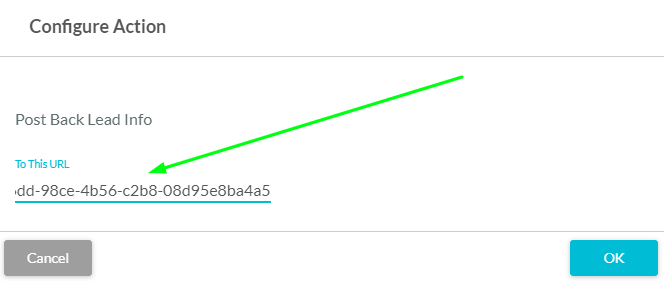
The text automation will now be active.
How do you disconnect this integration?
When you no longer wish to use the integration, you can disconnect it by following these steps:
1. Go to the Integrations section of your Text Request menu
2. Locate the SharpSpring integration box underneath the “Everyday Tools” section
3. Select “Settings” within the SharpSpring box
4. Select “Delete integration” at the bottom of the new page that appears
5. A new window will open and ask you to confirm that you’re sure you’d like to delete the integration
Once this integration is deleted, all contact syncing will stop.
You can reconnect this integration at any time by following the set up instructions above.