Set up messages to send at a later date or time.
Scheduling a message is exactly what it sounds like and allows you to Compose a message in advance, then set a date and time for the Contact to receive the message. This is great for scheduling reminders or notifications in advance for your Contacts.
Note: Scheduled messages follow the same time zone as the device used to create them or most recently edit them. If a user in Florida schedules a message to send at 8:00 am EST, a user in California will see that message as scheduled to send at 5:00 am PST.
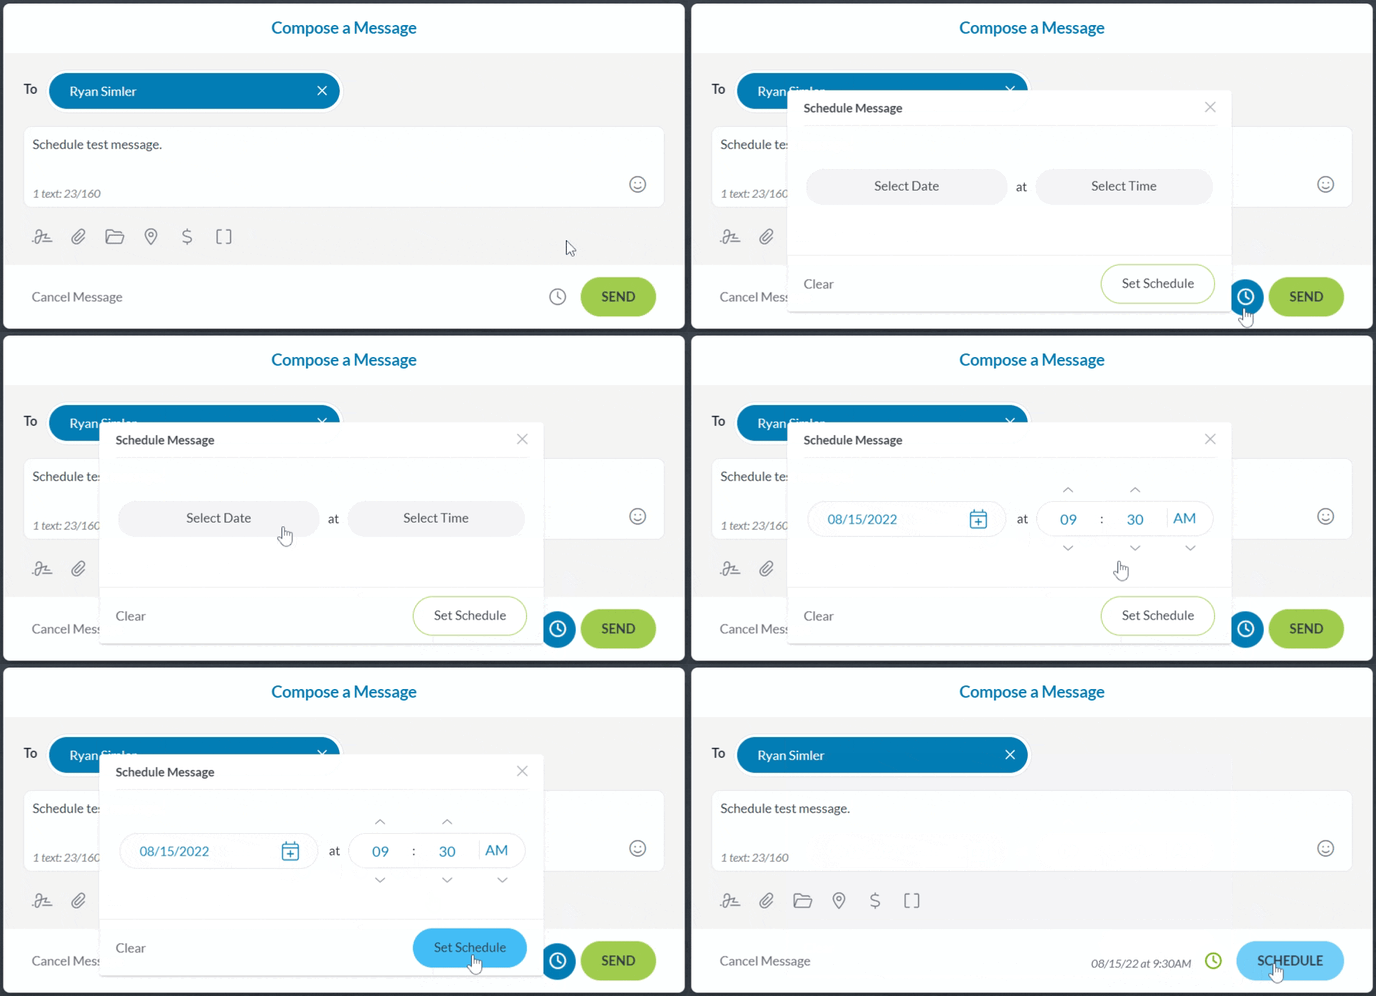
To schedule a message in advance:
1. Select the Compose Message button in the top right corner.
2. Enter the contact and message you want to send.
3. Select the clock icon and set the date and time you want the message to send.
4. Select Set Schedule.
5. Click Schedule. Your message will be sent on the date and time you set.

If you need to schedule multiple messages, simply repeat the process above for all of the messages you want to schedule. You can assign different dates and times to each message. See all of your scheduled messages in the View Scheduled Messages tab.
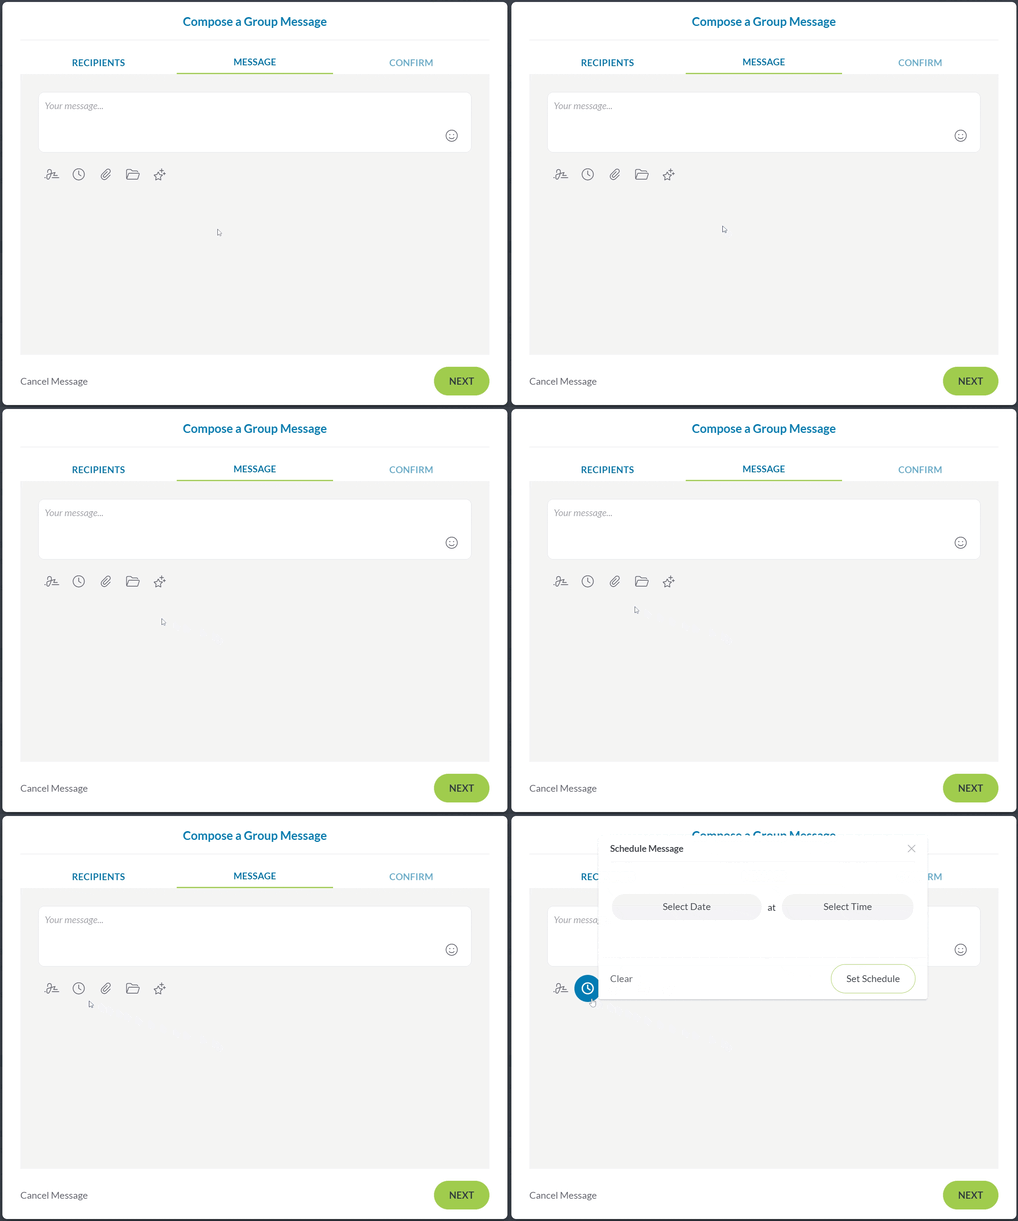
To schedule a group message in advance:
1. Create a new group message.
2. Enter the contacts you want to send the message to.
3. Select the clock icon on the message screen.

4. Select the date and time for when you want the group message to be sent.
5. Click Next to continue to the spam scanner.
6. Click Continue when the spam scanner finishes.
7. Click Schedule.
Canceling a Scheduled Message
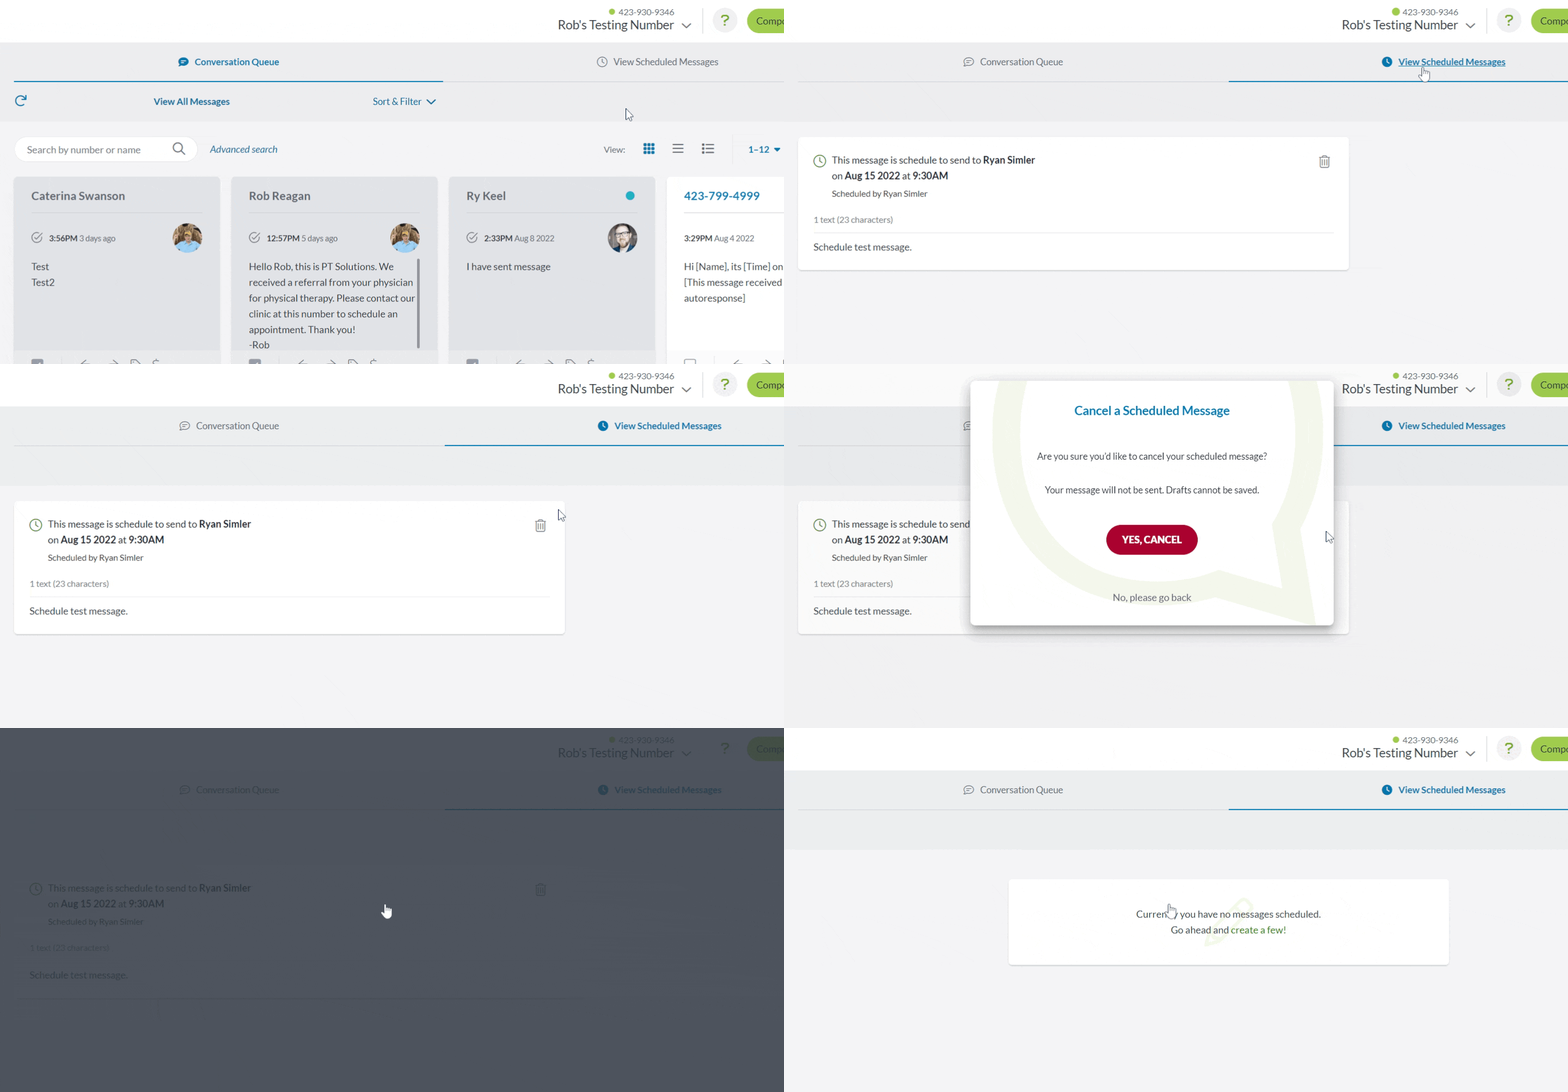
To cancel a scheduled message:
1. Select the View Scheduled Messages tab.
2. Find the scheduled message you want to cancel.
3. Click the trash bin icon (cancel message).
4. Click Yes, Cancel.

Editing a Scheduled Message
If you schedule a message, you can edit the recipient, the message itself, any attachments, and the scheduled time before it is sent.
To edit a scheduled message:
1. Select the View Scheduled Messages tab (individual or group).
2. Find the scheduled message you want to edit.
3. Click the pencil icon (edit message).
4. Make any necessary edits.
5. Click Save.